In RenderMan, it's possible to assign materials for every master surface.
Create a Scene
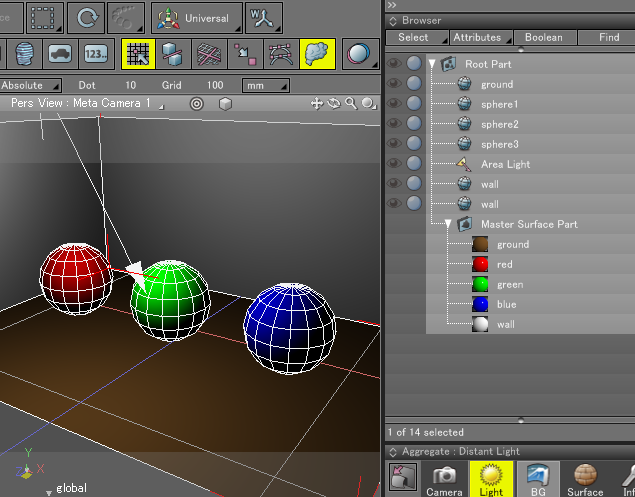
For this demonstration, we will use the attached sample: "samples / MaterialSpheres.shd"
For the light source, an Area Light is created. Point light source, spotlight, ambient light, won't be supported for the output.
While doing the RIB export, the reference will be the color / brightness visual information / light source of the surface light source.
Furthermore, it's possible to output 1 IBL by designating a background and an infinite light source as DayLight. You can learn more about it by reading the section: "RIB Export setting" about IBL/DayLight.
Specify Materials for RenderMan
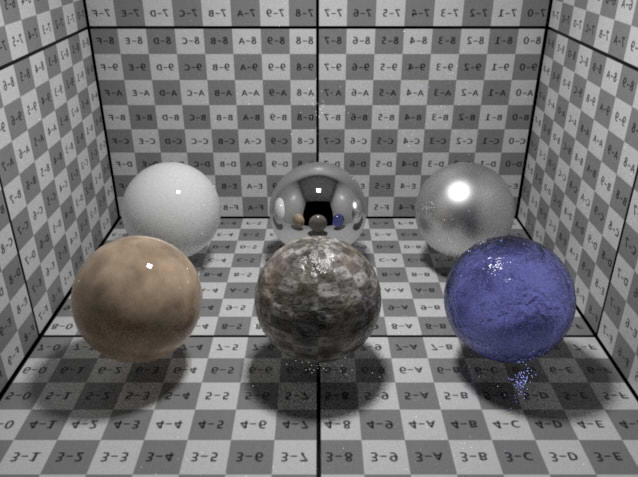
When exporting in RIB with a surface material / master surface, the output will be converted into a form similar to Shade 3D's rendering.
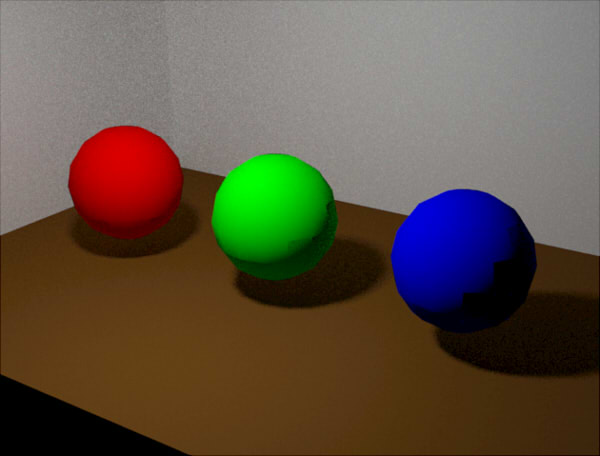
The image below has been rendered in RenderMan (samples / MaterialSpheres.shd).
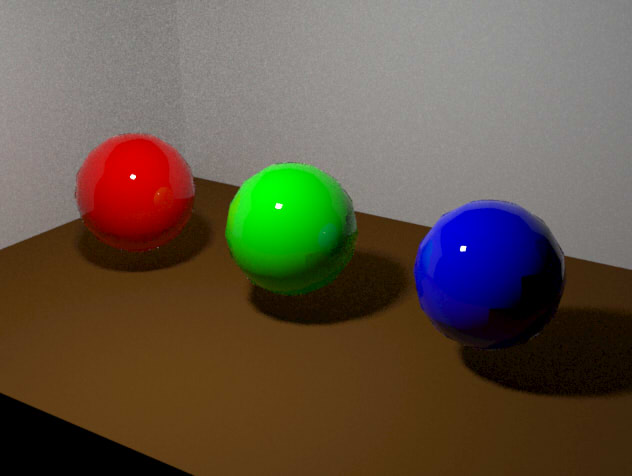
In the RIBExporter (RenderMan) plug-in, the Shade 3D rendering does not match the result in RenderMan.
Furthermore, since the surface material parameters in RenderMan are also different from Shade 3D's ones, please handle them as a separate thing.
In order to do the materials assignments for RenderMan, in the "View" main menu - select the "RenderMan Material" to perform the settings.
When you select a master surface from the browser, it toggles the individual settings.
For one single master surface, a material specification for RenderMan will be specified.
.png)
* If you select multiple master surfaces in your browser, you can also perform multiple changes.
When the "Use custom" checkbox is checked, you can change various settings in the "RenderMan Material" window.
If you leave this checkbox unchecked, the default RenderMan's settings will be applied.
When you press the "Convert from Surface" button, you can override the settings for RenderMan based parameters of the surface material.
"camera" check box is for the visibility group to specify the visible shape.
"Diffuse" or reflected in the diffuse reflection, "specular" or reflected in the specular reflection, including total internal reflection, "indirect" or reflect the indirect lighting, are to be specified.
If the "camera" check box is OFF, the displayed shape itself will only be a shadow.
Furthermore, by living the "indirect" checkbox OFF, you can increase the speed.
When the "Use depth" checkbox is checked, you will be able to specify the "maxdiffusedepth" "maxspeculardepth".
You can specify the number of reflections of diffuse reflection or specular reflection for each shape that you have assigned the material to. This makes it possible to abort the early processing if the ray collides with a specific shape, and will contribute to the rendering speed up.
However, it will look better to adjust the look to the overall balance because it also affects the depth of the surrounding indirect lighting.
Note: If you change various settings, and confirm by pressing the "Apply" button at the bottom left corner of the window you can still revert your action by pressing the "Revert" button.
Type of Material
In the "Material Type" pop-up menu, you can select the "PxrDiffuse" "PxrDisney" "PxrGlass" "PxrConstant".
This is the type of material that is available in RenderMan (Shader).
"PxrDiffuse" will represent the diffuse reflection only, which does not include the reflection or transmission.
"PxrDisney", the reflection will be included but its representation will not contain the transmission.
"PxrGlass" will generate a representation, including the transmission and refraction (e.g. glass).
"PxrConstant" will make a representation to fill without shading in the specified color and texture color.
By switching to the tab under the "Material Type", you can change the type of material.
The diffuse reflection texture, bump texture surface material of the mapping layer, if you have specified a normal map texture, will also be reflected in the rendering results.
PxrDiffuse
A representation of the diffuse reflection only. Highlights and total reflection by specular reflection, but no transparent representation.
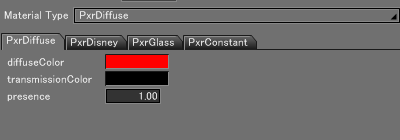
Specifies the diffuse reflection color in the "diffuseColor". If the diffuse reflection texture is assigned to the surface material, it will give priority to the texture's color.
The color of the shade not exposed to light will be specified in the "transmissionColor"
"Presence" is used for the mask.
A RenderMan attempt: " Samples / Material_pxrDiffuse.shd"
PxrDisney
Diffuse reflection, reflection, including a light-emitting source are represented. Among the material, you can choose to do the most diverse representation.
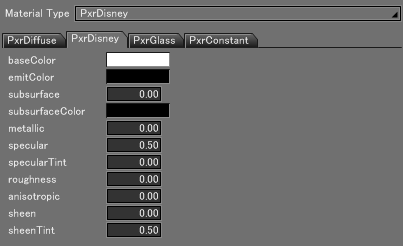
In "baseColor", specify the diffuse reflection color . If the diffuse reflection texture is assigned to the surface material, it will give priority to the color of the texture.
In "emitColor", you can specify the emission color. The emission color will not glare around the shape.
Internal scattering in the "subsurface", "subsurfaceColor" (SS: Subsurface) makes the color representation, even transparency is represented.
In "metallic" make a reflection mirror-like.
In "specular", "specularTint", set the highlight representation. When the "specular" value increases, it will contain some of the reflections.
In "roughness", you can set the roughness level of the render. It becomes a complete diffuse reflection at 1.0.
In "anisotropic" you will specify the anisotropic reflection.
In "sheen", "sheenTint", you will mainly adjust the material value of the cloth.
In the image below (samples / Material_pxrDisney.shd), the default representation of PxrDisney.
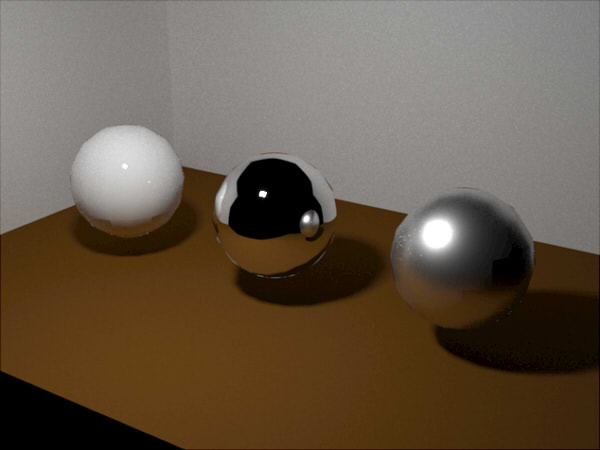
PxrGlass
Transparent representation, such as glass..png)
In "ior", specify the refractive index . No refraction at 1.0.
In "roughness", you will set the roughness. 0.0 in complete transparency, will render diffuse reflection as it approaches to 1.0.
In "reflectionColor" "reflectionGain" you will specify the color of the time reflected . It will be a slight reflection when "reflectionGain" is set to 0.
In "transmissionColor" "transmissionGain", you will specify the color at the time of transmission. This is useful for glass representation of a color. It will become opaque when "transmissionGain" is close to a 0 value.
In the "absorptionColor" "absorptionGain" parameters, you will specify the color for the absorption.
Look at the example below ("Samples / Material_pxrGlass.shd") to see an example of the glass render and the roughness settings.
PxrConstant
In this example, a representation that is not affected by the light source and that does not perform shading. Such as a fluorescent lamp, you can fill with different colors

In "emitColor", specify the color. If the diffuse reflection texture is assigned to the surface material, it will give priority to the color of the texture.
Look at the example below ( "samples / Material_pxrConstant.shd") - RIB Exported.
By previously assigning a texture in OpenEXR format with a dynamic range information as diffuse reflection texture surface material, it allows the material to express light emission.
PxrVolume
Create a volume representation, such as smoke. It is also possible to visualize the trajectories of light by using the volume representation.
However, it makes the rendering a bit heavy.
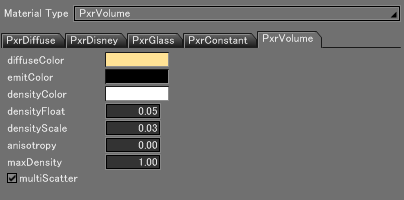
"diffuseColor" will specify the volume's color. RGB (1, 1, 1) will be a white volume, such as smoke. If the diffuse reflection texture is assigned to the surface material, it will give priority to the color of the texture.
"emitColor" will specify the emission of the volume's color.
"densityColor" will specify the color of the volume's attenuation. RGB (0, 0, 0) as the volume parameters will give a thin volume. If you specify the volume as follow: RGB (1, 0, 0), the color that is actually displayed will be in RGB (0, 1, 1).
"densityFloat"mspecifies the value that is multiplied with the densityColor . The closer to 0 it is, the thinner the volume will be.
0.01 - 0.05, etc., the result is better when adjustimg the value close to 0.0.
If the volume mapping layer attenuation distance is assigned to the surface material, it will give priority to the color of the texture.
"densityScale"mspecifies the value that is multiplied with the densityColor and densityFloat . The closer to 0 it is, the thinner the volume will be.
Transmission of the volume will be adjusted by the "densityColor" "densityFloat" "densityScale" parameters.
"anisotropy " will control the light's scattering. Specify a number between +1.0 and -1.0.
"maxDensity" controls the number of steps during the sampling volume.
When the "multiScatter" is On, we can calculate the indirect lighting in the volume. Leaving this parameter ON gives good rendering results.
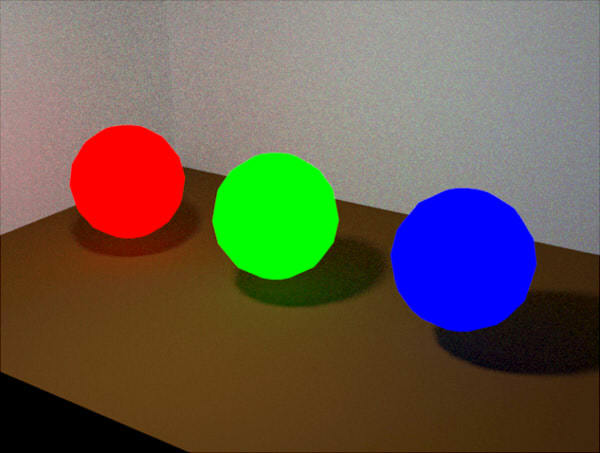
Look at the example below ("samples / Material_pxrVolume.shd") by RIB export.
The left sphere has the multiScatter turned Off, the center's one has the multiScatter turned On, the right sphere the result of a 0.3 maxDensity value and the multiScatter turned On.
(densityColor: white, densityFloat: 0.05, densityScale: 0.05)
Specify the Mapping Layer
The mapping layer can be specified as "image", "spot", "cloud".
"Image" Specifies the texture image. "Spot", "cloud" will express in PxrFractal the procedural textures (three-dimensional texture).
"Spot", "cloud" representation will not be the same as the Shade 3Drendering, but it is good for dirt representation.
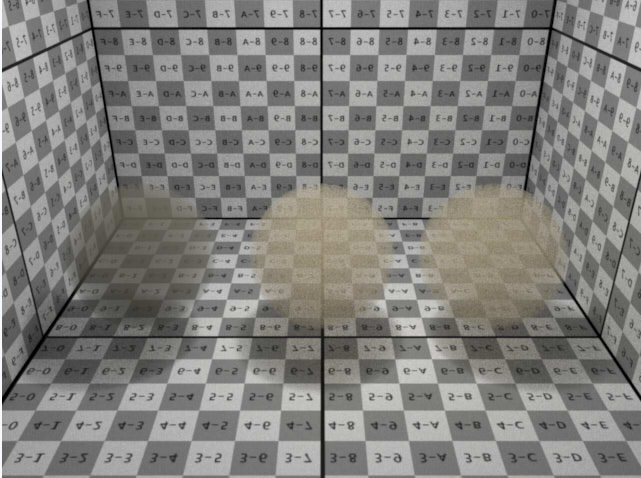
Below, a render example ( "samples / materials.shd") with RIB export.
Parameters of the mapping layer can be passed to the RIB.
In the case of image mapping, synthesis is set to "normal". You can also invert and specify the number of repetitions.
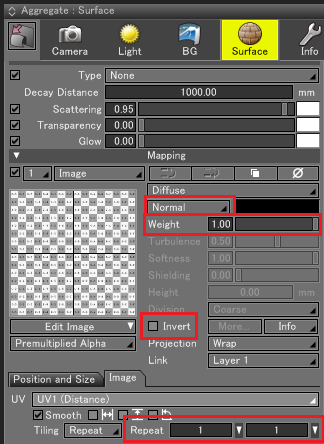
Furthermore, the mapping is only n UV map.
Transmission of pixels in the "alpha transparency" is available if you have an alpha element.
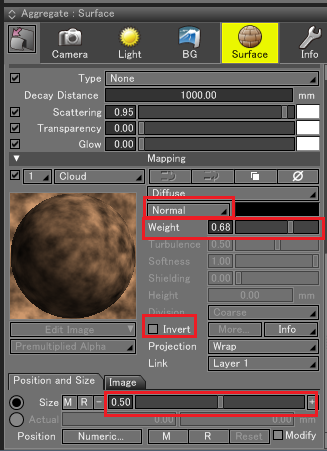
In the case of spot / cloud mapping, synthesis can only be set to"normal". You can also invert and specify the number of repetitions.
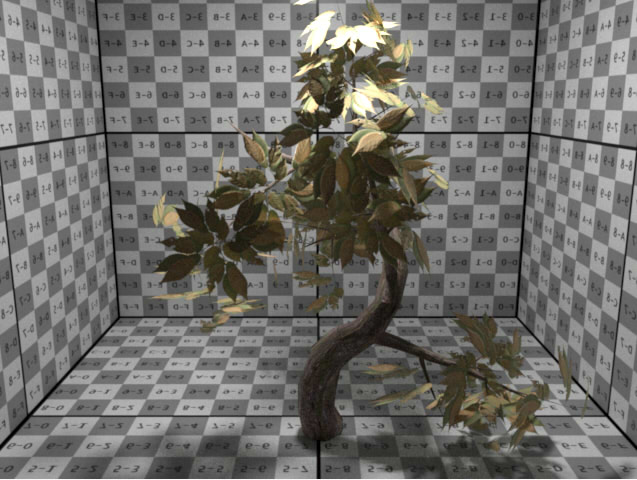
Here is a rendering example ( "samples / tree.shd") by RIB export. Here is shown transparency with alpha leaves.