


AOUtil by Ft-lab
Installation
For Windows Users:
Copy the AOUtil.dll (64bit version AOUtil64.dll) to "C\Users\username\Documents\Shade 3D ver.16\plugins" folder and start Shade 3D.
For Mac OS users:
Copy the "AOUtil.shdplugin" folder to "/Users/username/Documents/Shade 3D ver.16/plugins" folder and start Shade 3D.
Usage
In the following demonstration is described the steps needed to reflect the vertex AO and AO Map of a polygon mesh.
Lets use the sample file "samples/ao_tree2.shd" that can be found inside the AOUtil folder.
These trees like polygon models planted on the ground are ideal to demonstrate the use of vertex AO on parts such as the stem and the leaves. The AO Map is suitable especially in this situation where a ground is a simple plan/polygon mesh.
The scene in Raytracing before using AOUtil. 
AO will be assigned both to the tree on the right side and the ground.
1- Adjusting the ambient light
Vertex AO and the AO Map will allow to render a much more contrasted illumination of the object.
AO will reproduce the ambient light artificially.
Therefore, the effect itself is very subtle. First, in the Light settings, set the Ambient light to 0 and reduce the Intensity to 0.10.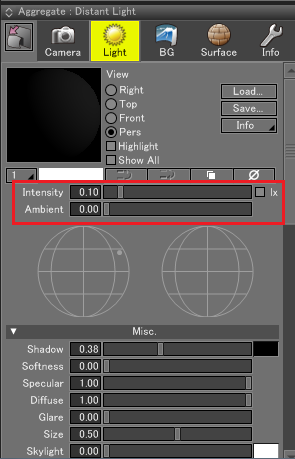
The Ambient setting in the Light Attribute of the Light object of the scene will be set to 0.8.
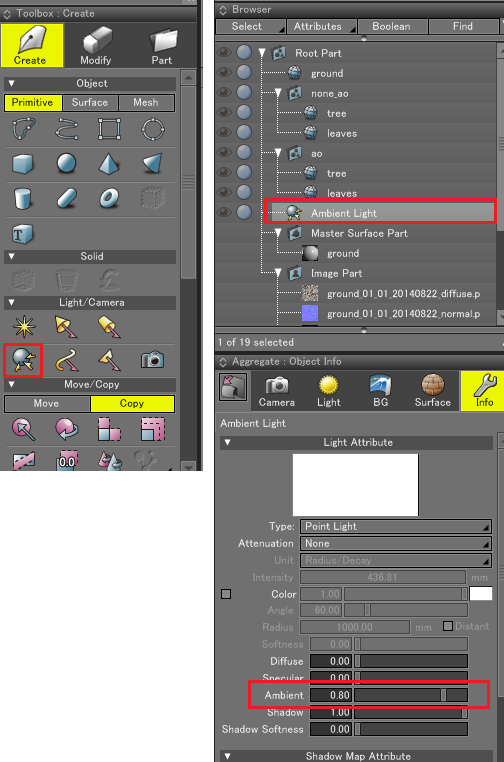
Since the Ambient setting has been turned down the shadows darkness will decrease and the color of the texture will plainly appear.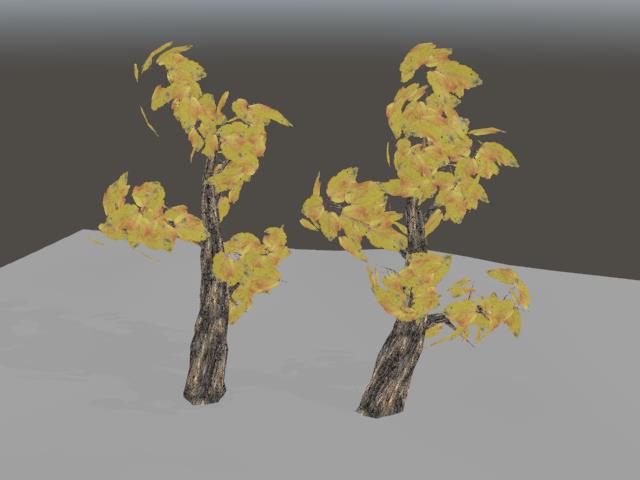
From this step, the vertex AO and the AO Map will be generated.
In the Browser, select one or several polygon meshes and choose from the "Attributes" menu "AO: AO calculation target".
The "AO Target" label will appear next to the chosen polygon mesh which will become the collision reference form during the AO calculation. 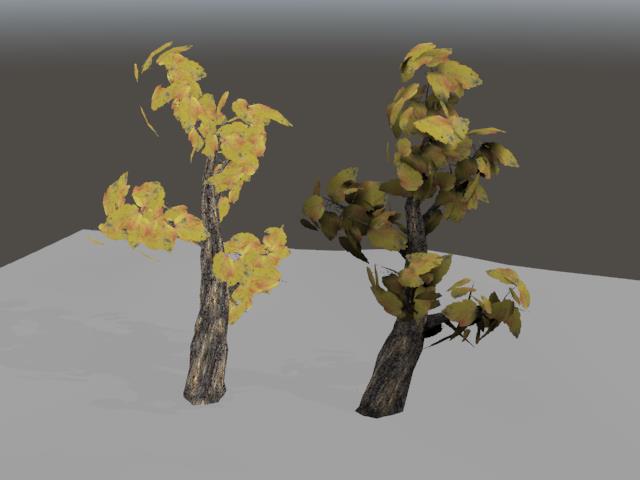
3- Calculate the vertex AO
Select the tree's trunk polygon mesh in the browser and then in the "Attributes" menu, select "AO: Calculate Per-Vertex AO".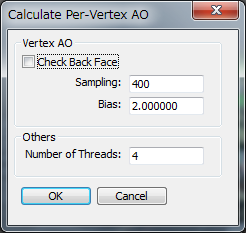
Adjust the "Sampling" parameter in the dialogue box and press "OK". The AO calculation is performed.
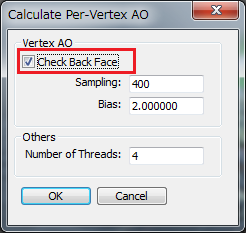
Select the leaves polygon mesh from the browser and from "Attributes", select "AO: Calculate Per-Vertex AO".
In this case, you need to check the checkbox "Check Back Face" and press the "OK" button.
At this point, the vertex AO is still not reflected at the time of the rendering. You must assign a "vertex color" Shader.
4- Assign Vertex color shader
Select the stem polygon mesh and the foliage, select "Vertex Color" in the Mapping Method drop down menu, use "Diffuse" as type and then select "Multiply" for the blending mode.
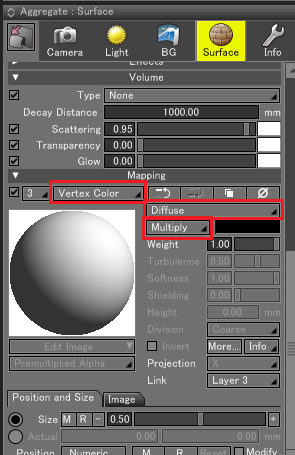
You can also adjust the vertex color gamma value by selecting "Other".
Once the rendering is done, the tree on the right side shows the result of the vertex AO on the trunk and the foliage.
5- Calculate the ground's AO Map
In the browser, select the ground's polygon mesh, in "Attributes", select "AO: Create AO Map".
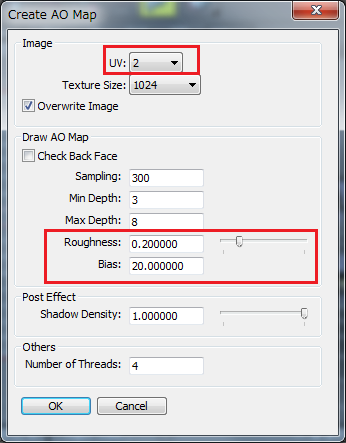
In the "Create AO Map" dialog box, specify the texture size for the selected UV.
The UV must be arranged to avoid overlapping faces.
As other parameters, Roughness is set to 0.2 and Bias is set to 20.0.
Then press the OK button, the texture of the AO Map is generated.
The AO Map is assigned to the mapping layer of the surface material.
The generated AO Map is now a texture. As Mapping type for the Ground's surface material, the AO Map is set to "Diffuse".
Make sure to specify the UV layer that you want to assign the AO Map to.
Once the rendering is performed, the Ground's AO Map is now visible.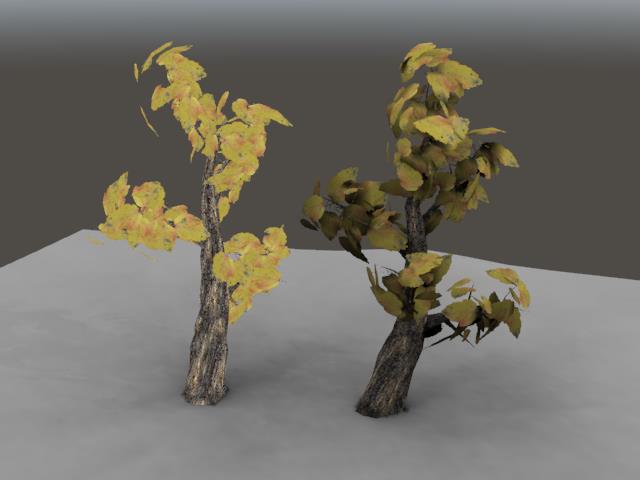
For more details and information about the parameters settings, please refer to the documentation.

500 JPY (Approx. 4.22 USD)