


Shade 3D for Unity - Tutorial (Based on Shade 13 version)
Part 1. Export Shade scene file for Unity
It's a very easy thing to export Shade scenes to Unity, in this tutorial, we will see the basic Shade's operations and workflow.
- Introduction of Shade interface.
- Tweak objects.
- How to export scene file to FBX format.
- How to fix nomals, positions.
- Import to Unity and make some physics.
This tutorial mainly targets beginners and focuses on very simple commands as well as simple Unity technics. The Unity's FBX export engine is very powerful so no need to worry about the conversion. With Shade 3D, you can easily start to make games for Unity!
Export an FBX file and Import it into Unity
Go to Application folder, or LaunchPad, start "Shade 3D for Unity", you will see the following interface:
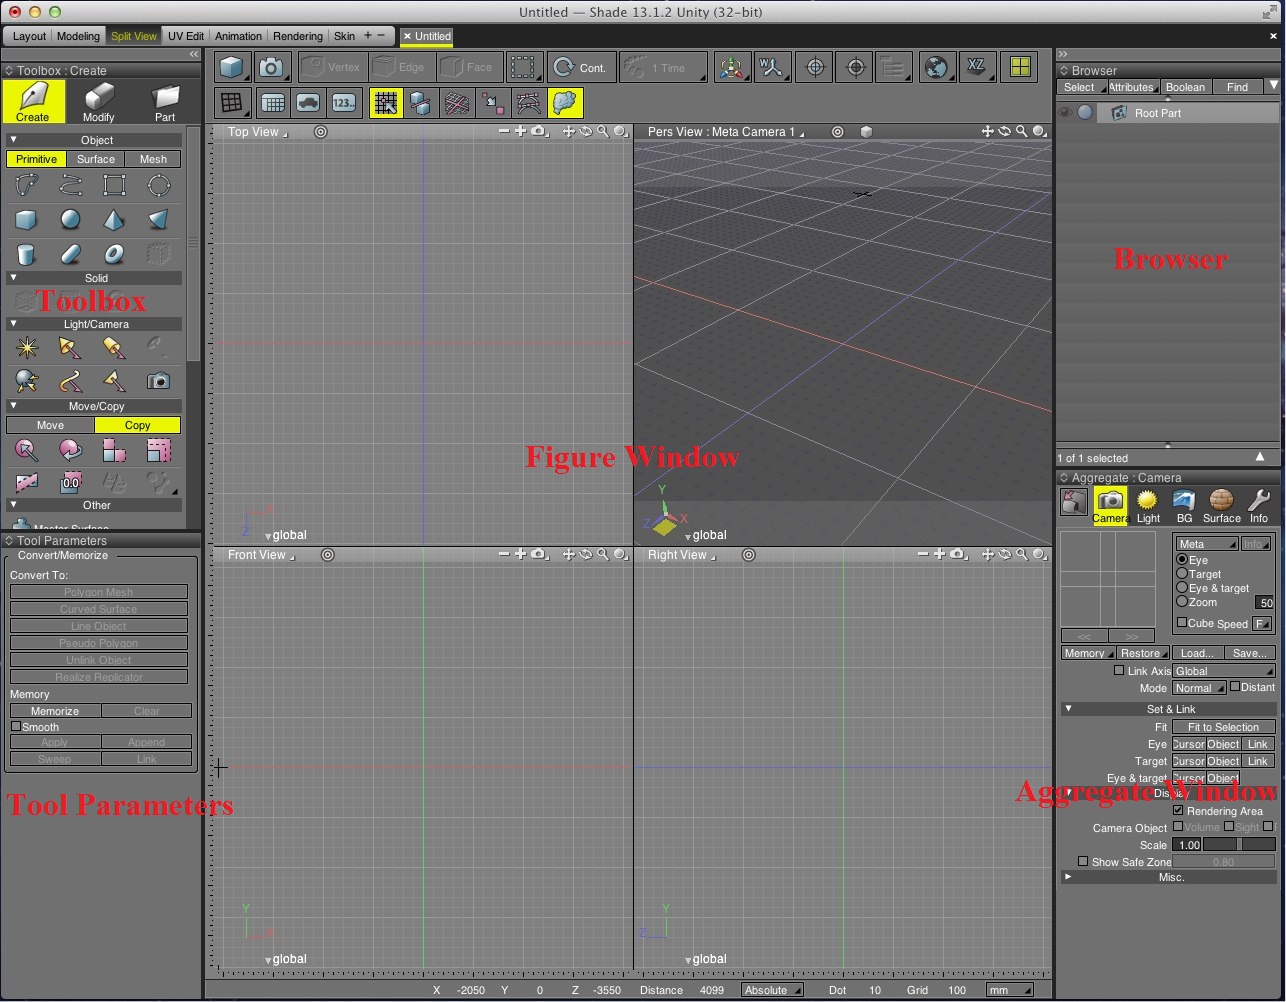
On the left of the main window, you will find "Toolbox" and "Tool Parameters". You can perform many commands from these panels.
In the center is the "Figure Window". All objects of the current scene are displayed here and you can modify them or create new objects.
In the upper right corner is located the "Browser". Here is the hierarchy of the entire scene tree. Entire objects can be seen and you can select each of them.
Below the browser is the "Aggregate Window". In this window, some other properties windows are displayed.
"Surface Window" shows the material of the selected shape. "Object Info Window" (wrench icon) shows the parameters of each shape, like polygon, lines or bezier-curve. The other 3 tabs are not mentioned in this tutorial.
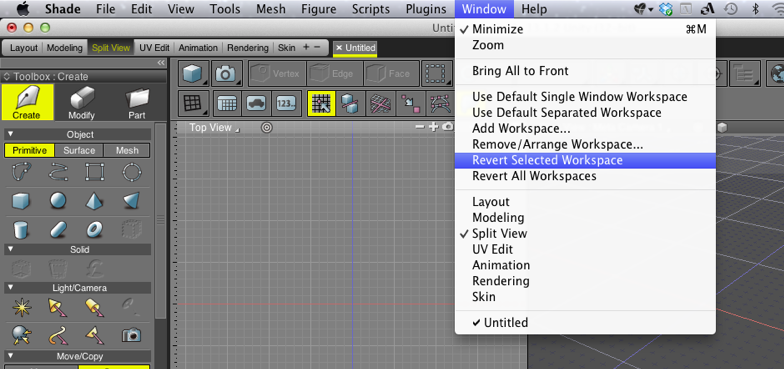
If your workspace does not look like what you are seeing in this tutorial, select from the main menu "Window > Revert Selected Workspace" command, you will get the default windows arrangement (see the screen capture below).
At first, click "View" Menu and select "ShadeExplorer", this window is a file browser for viewing Shade contents (scene files).
Shade 3D has some sample scene files included in it. Click "Object" from the left tree panel. For the first time, a pop-up window will be shown because thumbnail images are not ready yet. Please click "OK" and give Shade some time to calculate.

Then, you'll find some sample scene files on the right side. Double click on the "bear.shd" in order to open the file.
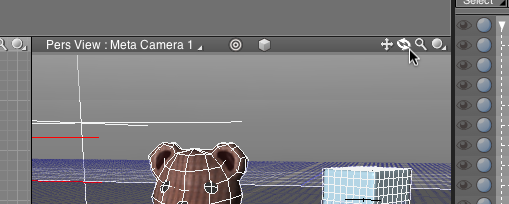
You will see a wireframe of the entire scene in the Figure Window.
In Figure Window, you can customize the objects appearance. Click the smal sphere icon at the upper right corner of each view, then select "Texture and Wireframe", then you will see a shaded or textured version of your shape (it can be set in all views).

To pan in a view, keep pressing Space Key while dragging the left mouse button. You can also use the cross icon in the upper right corner of each views. With these icon, only dragging is needed.
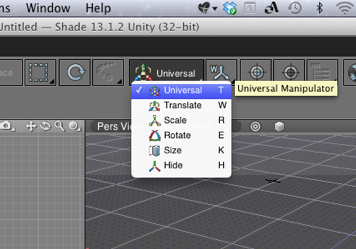
At the top of the window, you can find the "Manipulator Selection" button. At first, it will show "Universal Manipulator". This manipulator will allow you to translate, scale and rotate at the same time. You can choose other kind of manipulator. If you feel indistinct in Figure Window because of the manipulator, choose "Hide".
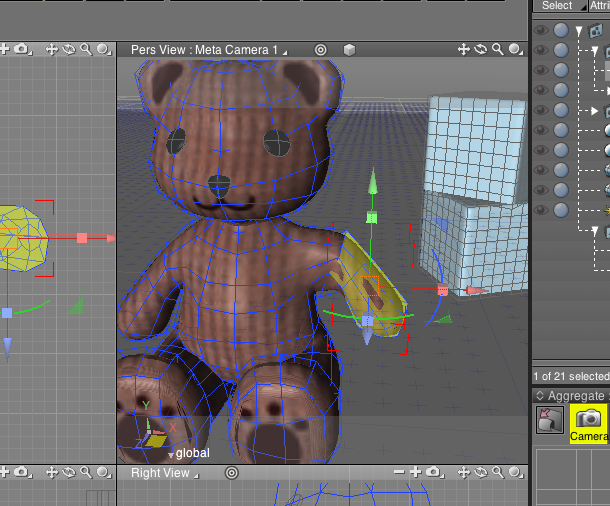
Let's tweak some objects in this scene file. Select the "bear" object from the browser, then drag the manipulator in the Figure Window (you can click and select directly bear polygons from the Figure Window). Keep in mind that in Shade 3D, objects can be grouped in folders called "Part", you will find in it all your shape's elements. For example, the bear's face contains also the eyes and a nose.
You can create your own Part folders from the Toolbox.
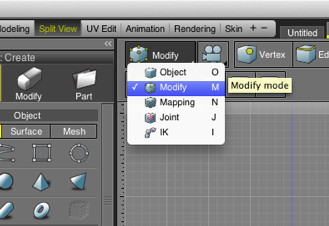
If you want to modify the each element of a polygon mesh, use "modify mode".
1. Select the polygon mesh "bear" from Browser Window, or click in the Figure Window.
2. Hit "Object" button in the control bar and select "Modify", or just press "m" Key.
3. This is a shortcut for the "Modify Mode". You can modify internal element of a polygon mesh.
4. Drag in the Figure View to select faces.
5. Try to drag the Manipulator.
6. Finish your action by pressing "Enter" key.
Importing FBX files into Unity is pretty easy when it comes to simple objects and materials. So you don't need to worry about subtle parameters of the export settings.
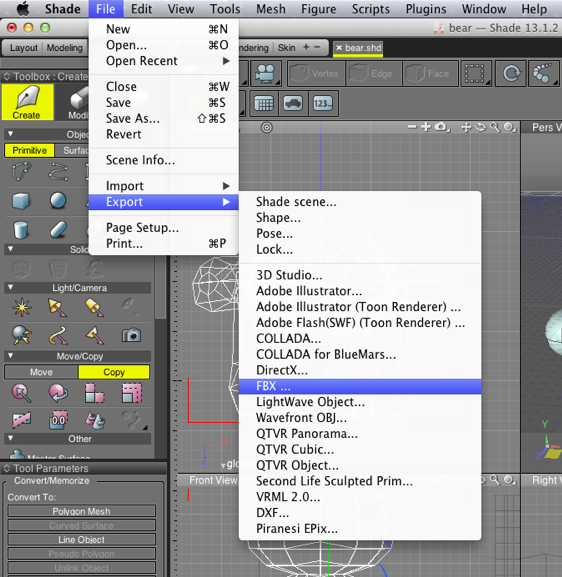
1. Select "File > Export > FBX..." command from File menu.
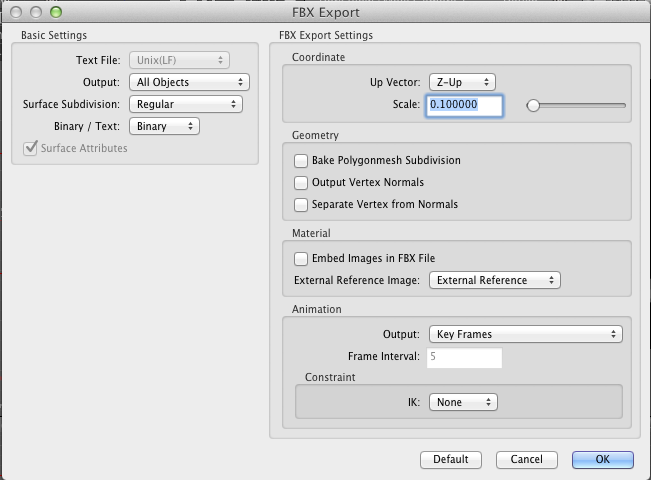
2. In this tutorial, you don't need to touch properties, just click OK.
3. Choose a directory, and type your FBX file's name.
1. Start the Unity application, then create a New Project ("File > New Project...").
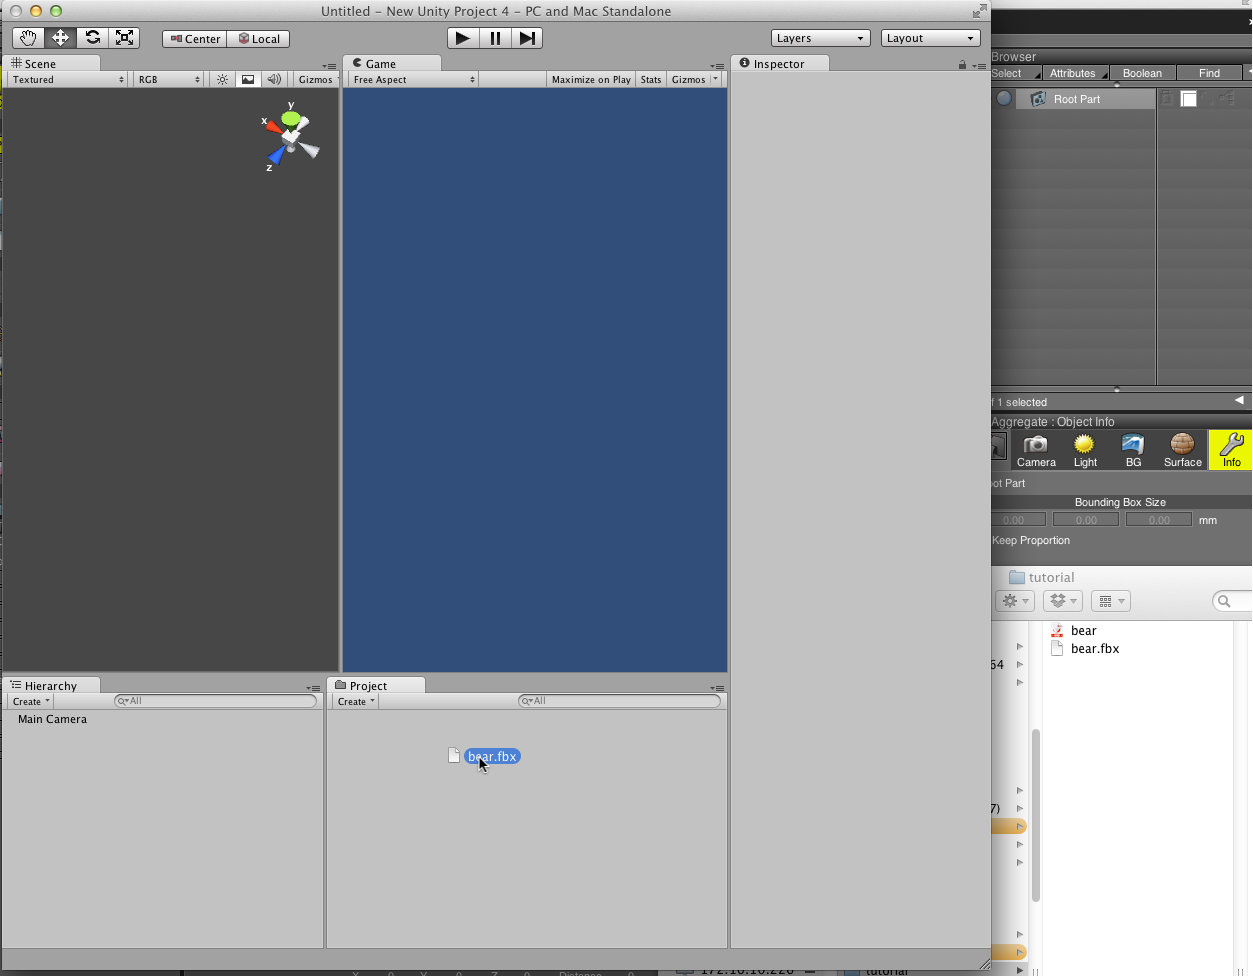
2. All you need is to drag and drop the ".fbx" file into "Project Tab" from Finder.
3. Drag this icon into Hierarchy. This Object is shown in the current scene.
You may also need to set the camera position correctly, and create a Directional light in the Unity scene.
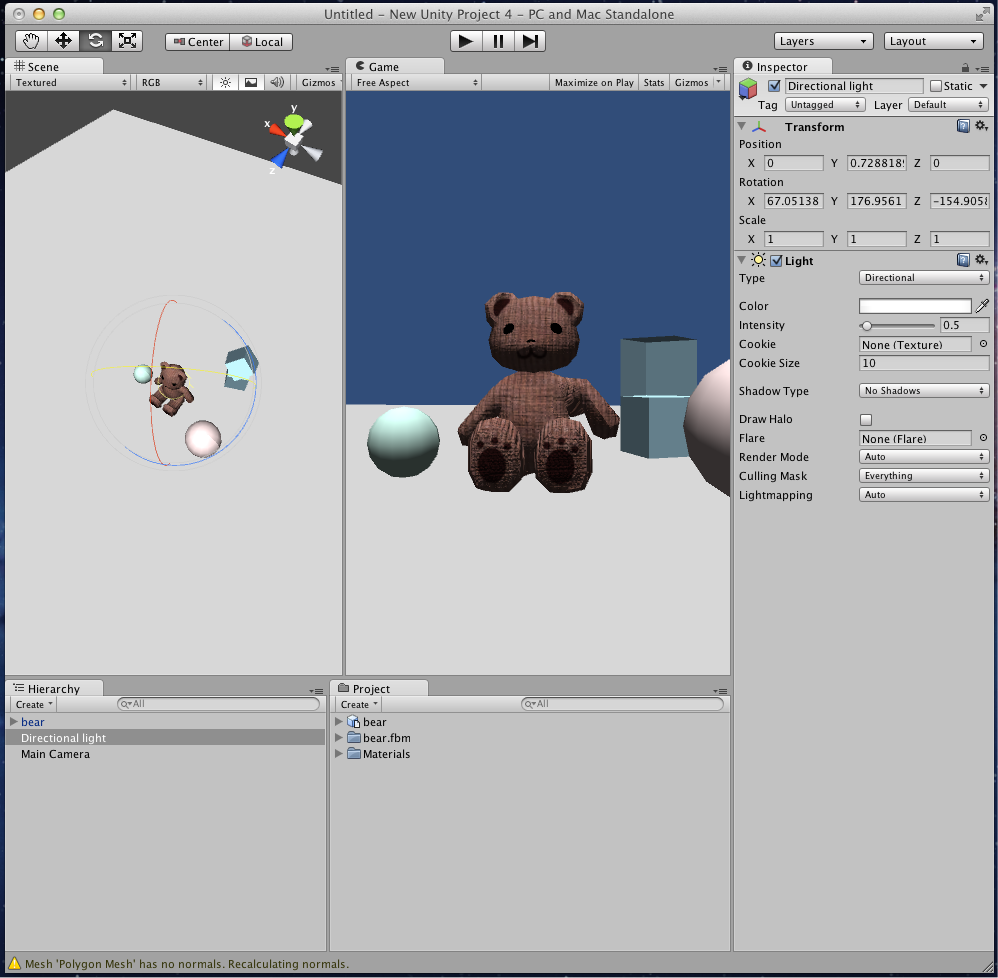
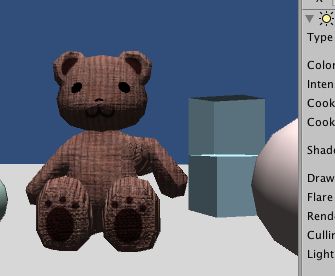
In the Unity's scene View, there are mistakes at some points. This is because that the face's normals are flipped. In Shade 3D, all shapes are treated as "double-sided polygon" in order to avoid confusion while rendering. But Unity doesn't do that, so you must fix this.
There are some ways to check shape normals.
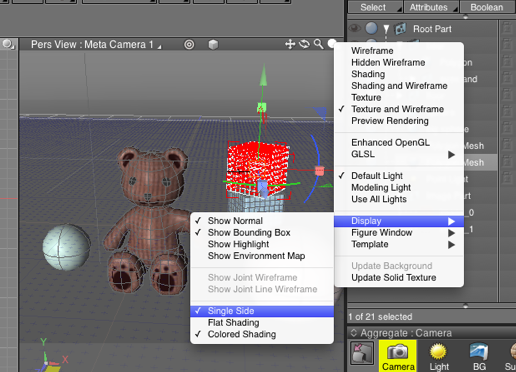
1. Click the small spherical icon in the upper right corner of each View
2. Select "Display > Single Side"
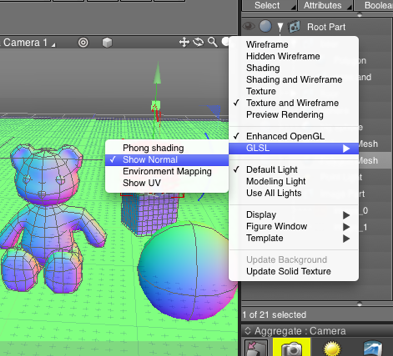
a) Select "Display > Show Normal" -- This shows the directions of each normal of the selected object.
b) Select "Enhanced OpenGL", then also select "GLSL > Show Normal" -- This is only effective when you choose "Shading" or "Texture" method.
Then, you can easily spot the flipped shapes.
1. Push the Triangle shaped button in the upper right corner of the Browser Window, some parameters will be displayed.
2. Click "Flip Face" check button (when you move the mouse cursor on this check box, this button's title is shown at the bottom of the Browser Window. This shows "Flip Face").
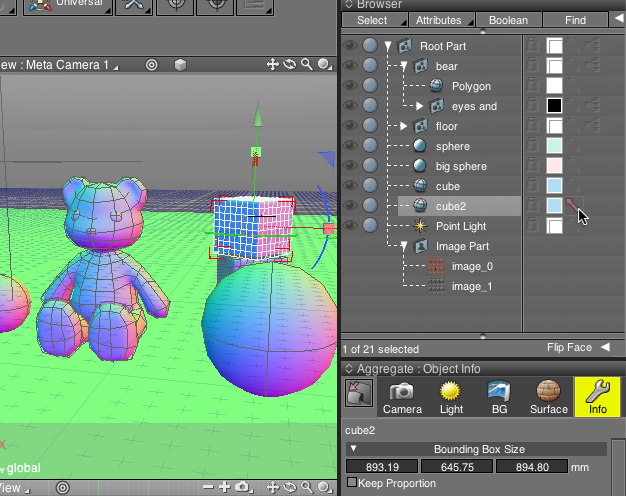
This "Flip Face" means that all shapes under the specified shape or part are flipped.
Another way to adjust face normal is the following:
1. Select "Cube 2" polygon mesh
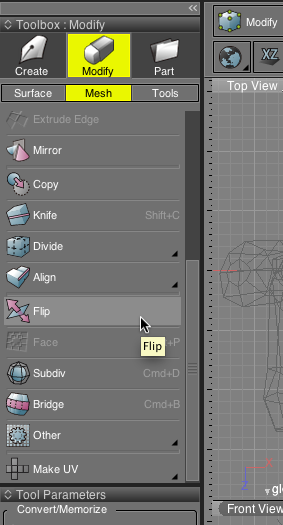
2. Press "m" key, then entered the "Modify Mode". By default, this is face mode. You can see it in the Control Bar.
3. Select "Edit > Select All" command from the menu.
4. In the Toolbox, click the following: "Modify > Mesh > Align > Unify Normals"
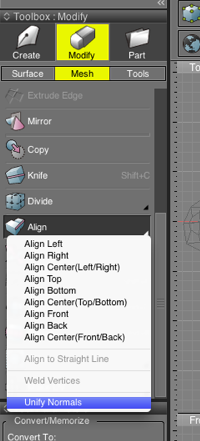
This command makes all normals well aligned.
Then, try to export your FBX file and import it to Unity again.
In Shade 3D, You can use some other types of primitives rather than a polygon mesh, for example: Bezier Curve, Line, Extruded-Line and Revolved-Line. When these shapes are exported in FBX file, they are automatically converted to polygon mesh.
In Unity, the polygons count is very important (optimization purposes), and Shade 3D can treat "Catmull-Clark subdivision" with polygon mesh. In this case also, you must control the subdivision level.
You can do the following:
1. Select "File > Export > FBX..."
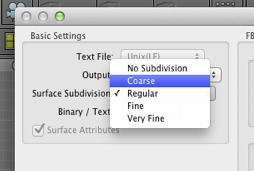
2. At the FBX Export setting dialog, Go to the "Surface Subdivision" pop-up menu, then select "Coarse" or "No Subdivision"
3. Then Click "OK"
This setting controls the subdivision level of all shapes in the exported files. If you want to control each shapes separately, try the following:
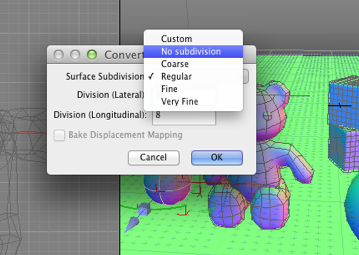
1. Select Sphere from Browser
2. Go to "Tool Parameters", hit "Polygon Mesh" button in "Convert to:" category.
3. Setting dialog is shown. Select Subdivision Level.
4. Press "OK"
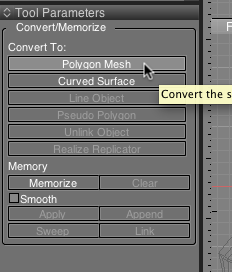
This will convert primitives into polygon meshes. All primitives can be converted into polygon meshes within Shade 3D. This technique can be also used as making a collision mesh. Try to make an object with the subdivision surface, then duplicate this and convert each objects with different subdivision levels.
If you want each shapes separately, choose "Selected Objects", rather than "All Objects" in the "Basic Settings". In this case, it's important to position the original shapes accurately. Usually, each part is modified with its own matrices. So if you don't care about it, some Unity Component like Collision Shape will be hard to set precisely.
Try this to check the current information:
1. Select 'Root Part' from the Browser Window
2. Hit "Info" tab from Aggregate View to show "Object Info"
3. Check the matrix values in "Part Attribute". Normally, Scale is set to 1.0, and other parameters are all "zero".
![]()
In Shade 3D, the root part itself can also have Matrix Transformations values, so sometimes this causes troubles for the integration in other software.
If you will export "Selected Objects" only, check all parent parts of the selected objects. This is sometime hard to check and fix matrix transformations.
1. Select "Edit > Copy"
2. Create a new scene file from "File > New"
3. "Edit > Paste" into the new scene file

This will reinitialize the objects matrix, but the "Translate" value won't probably be zero, so you'll need to enter a new value.
Have Fun!