| >>Back to Tutorials Page<< |
From the version 2 of Substance Painter, you can find a Shade 3D Export Preset. Here is a step by step process to follow in order to use Substance Painter's textures in Shade 3D.
1 - In Shade 3D, make sur to unwrap your UVs.
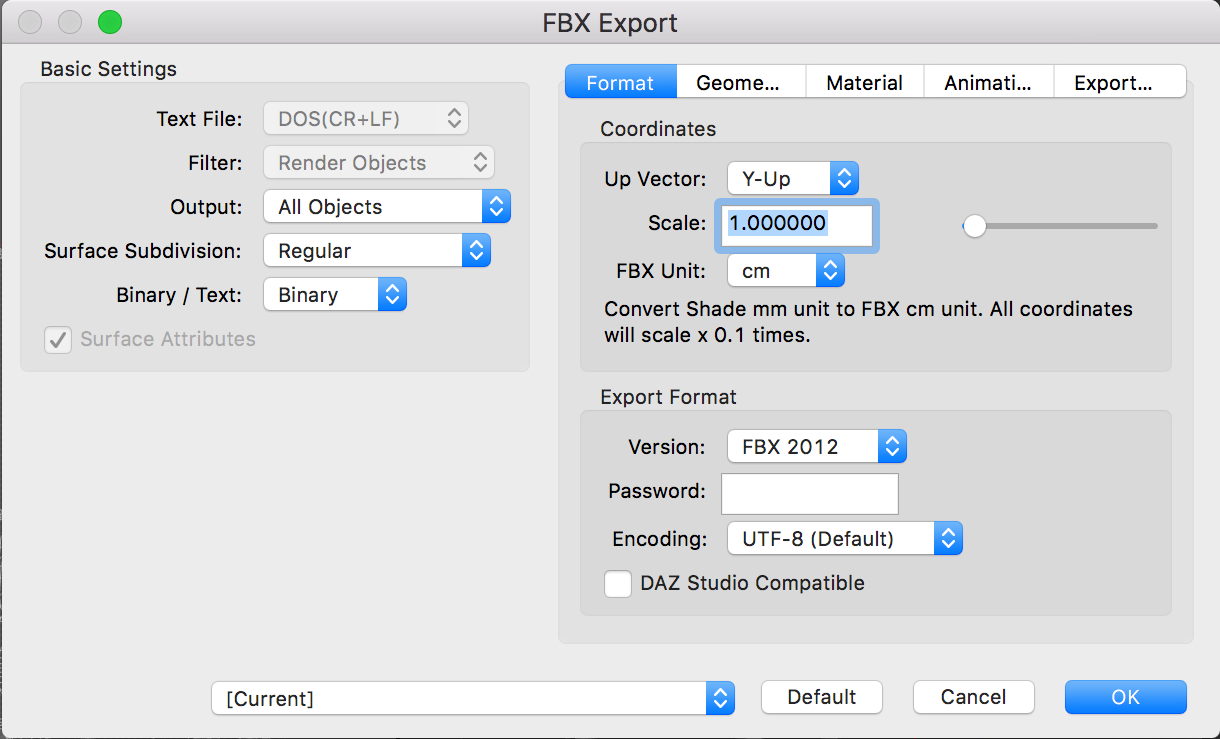
2 - Export your file in the FBX format ( File/Export/FBX...)
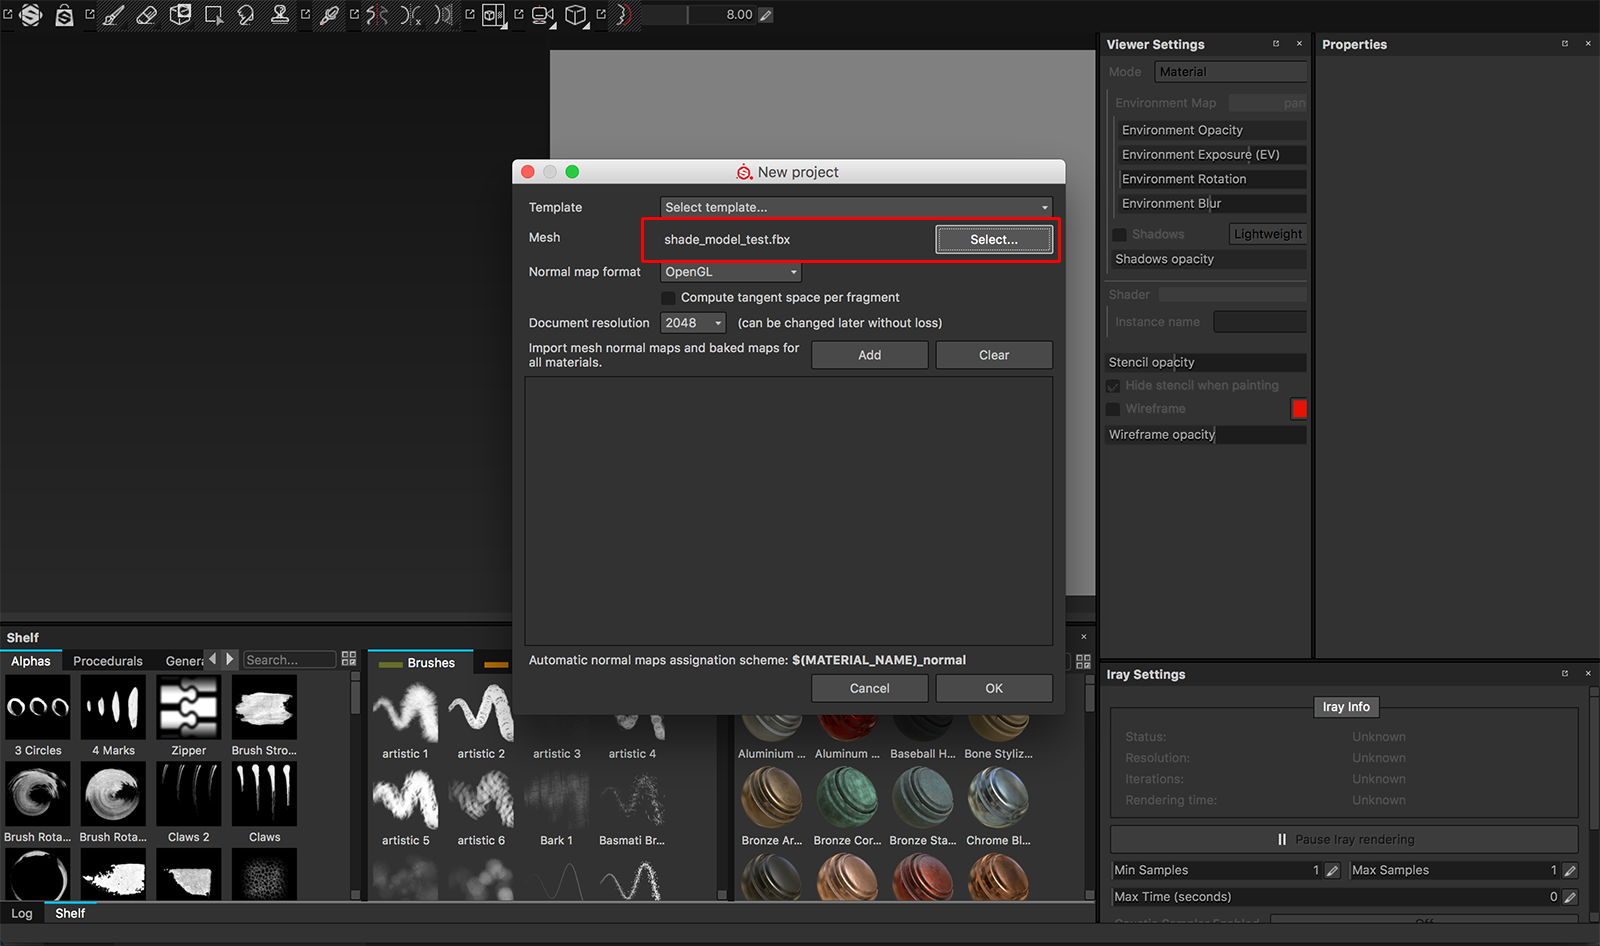
3 - In Substance Painter, create a New project and import your FBX file (File/New.., a dialog box will appear, click on "Select" to choose your file).
4 - Your model will be displayed.
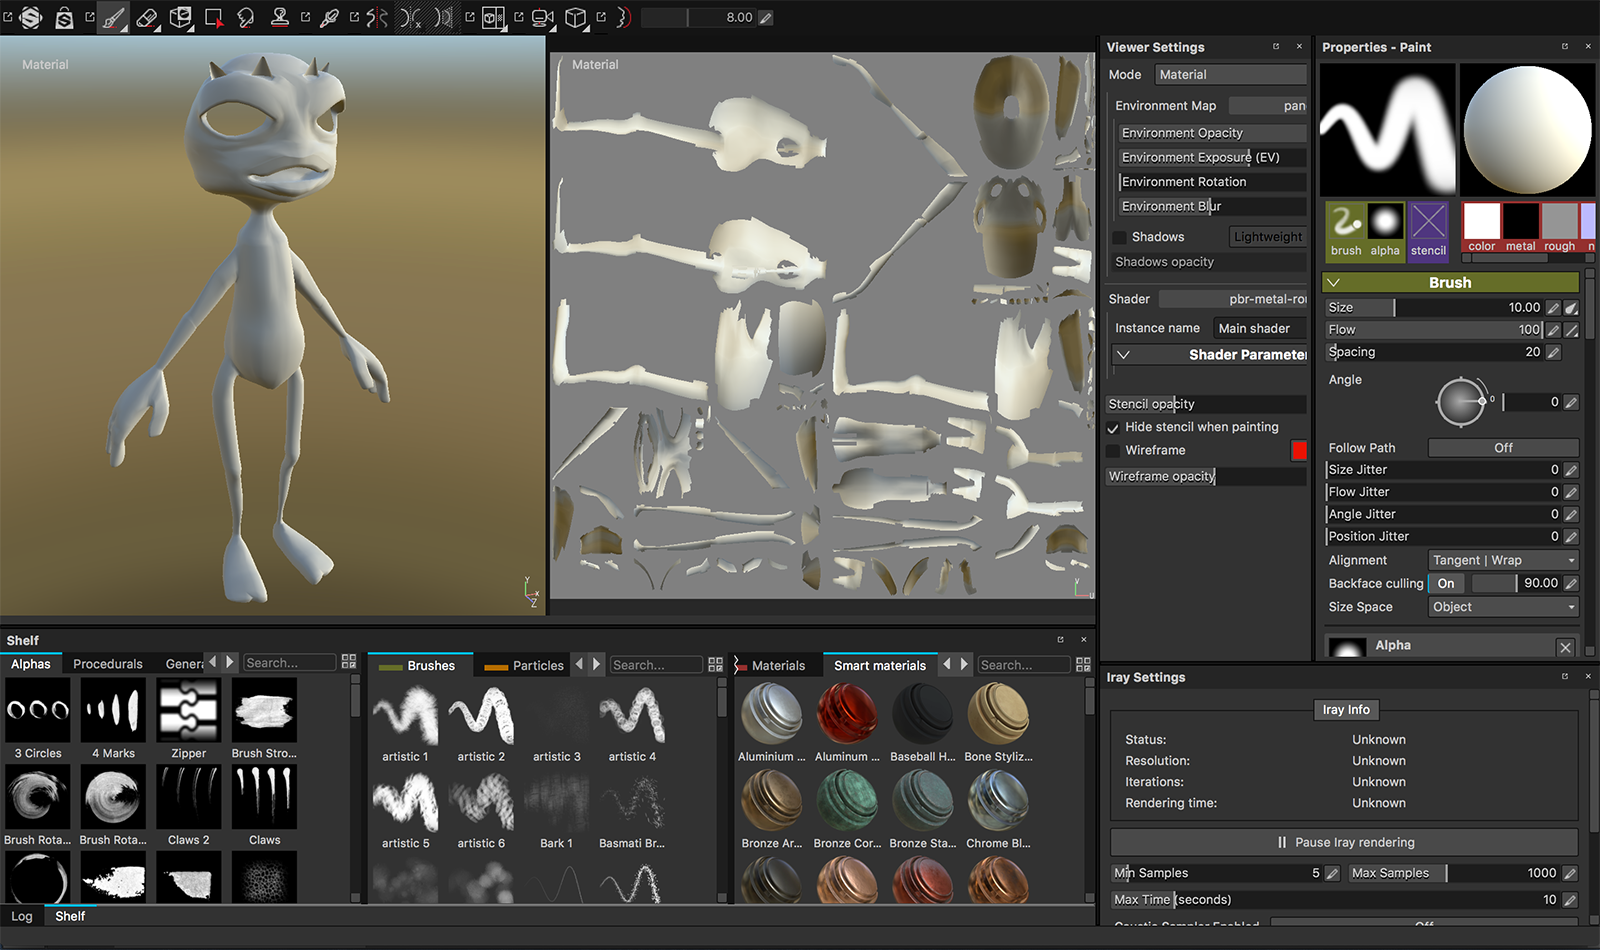
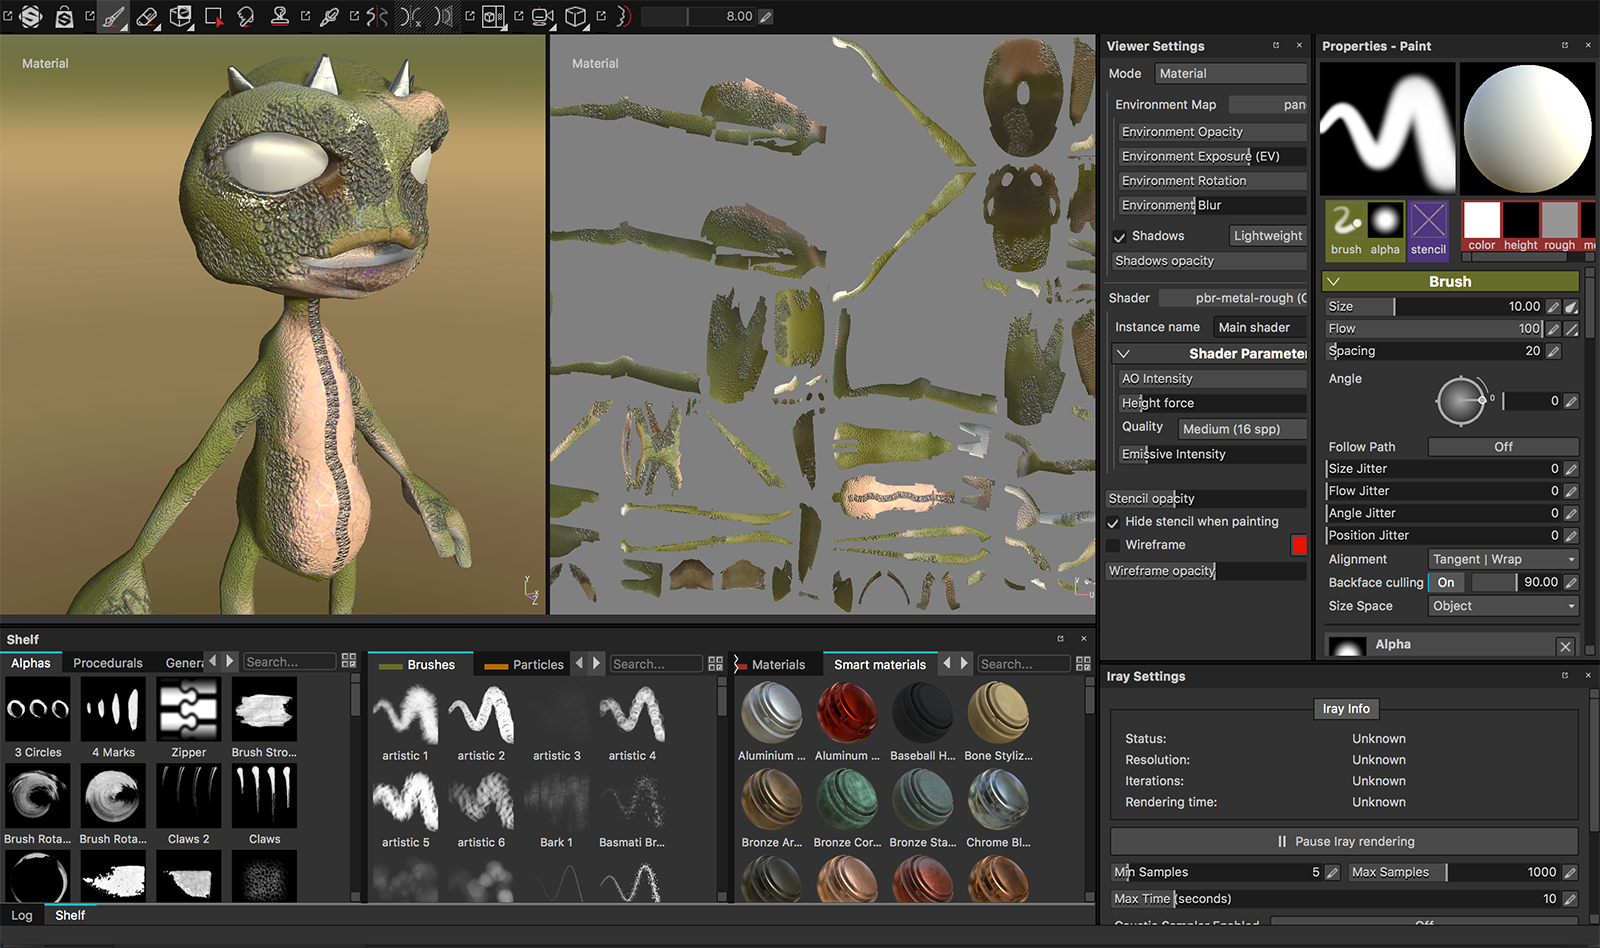
5 - Paint your model.
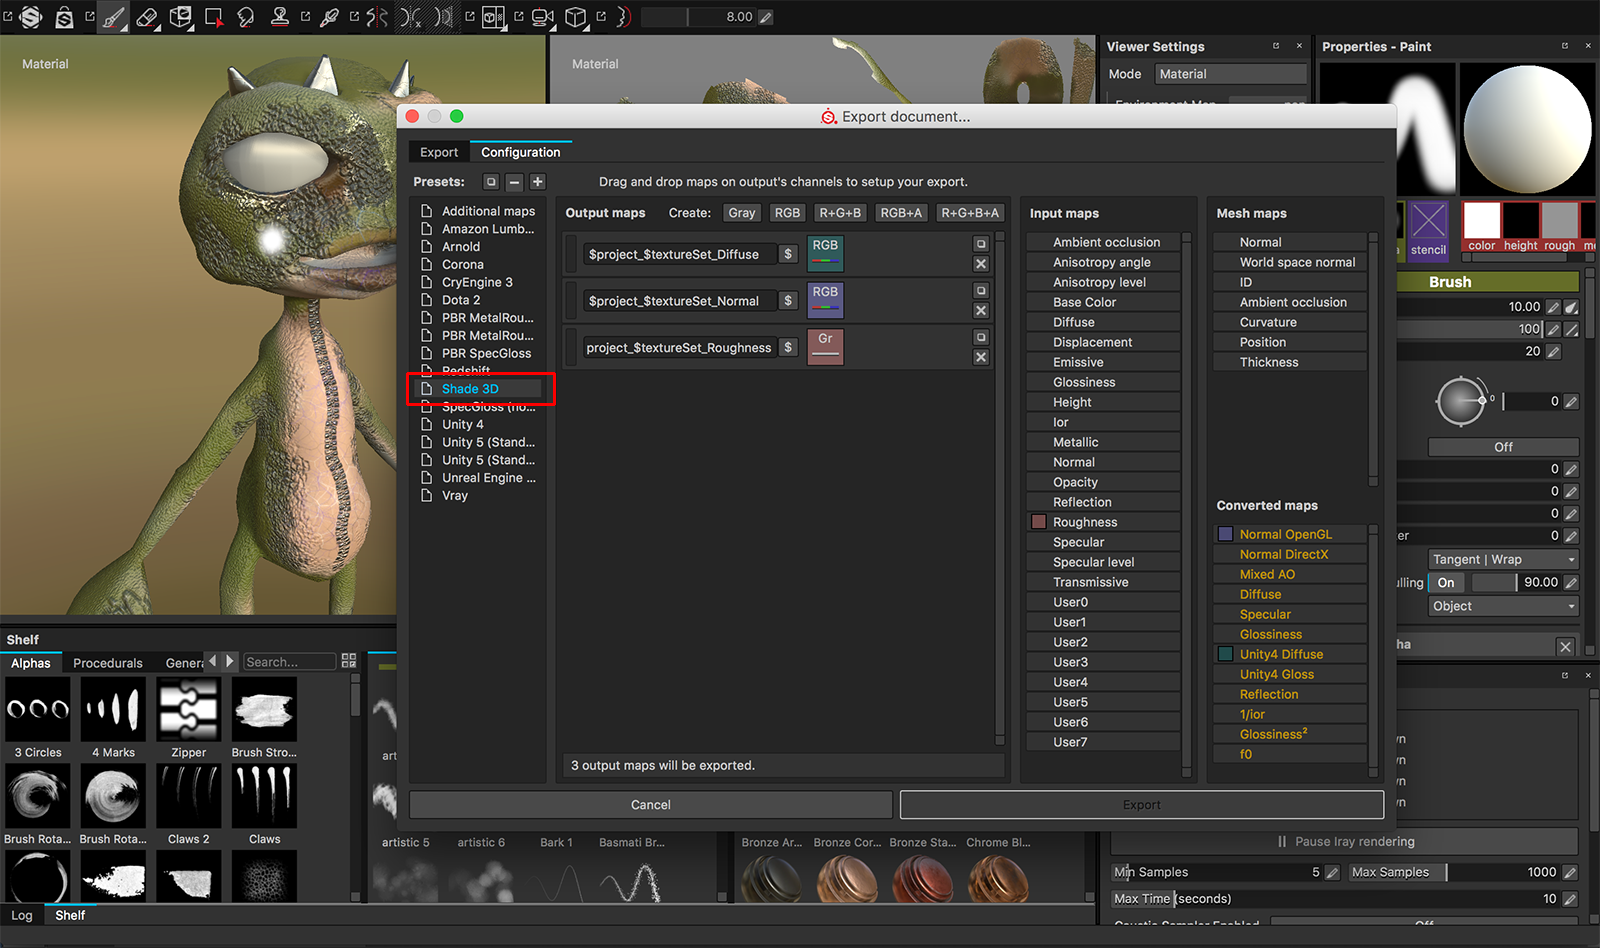
6 - Export the textures (File/Export Textures...) with the Shade 3D preset.
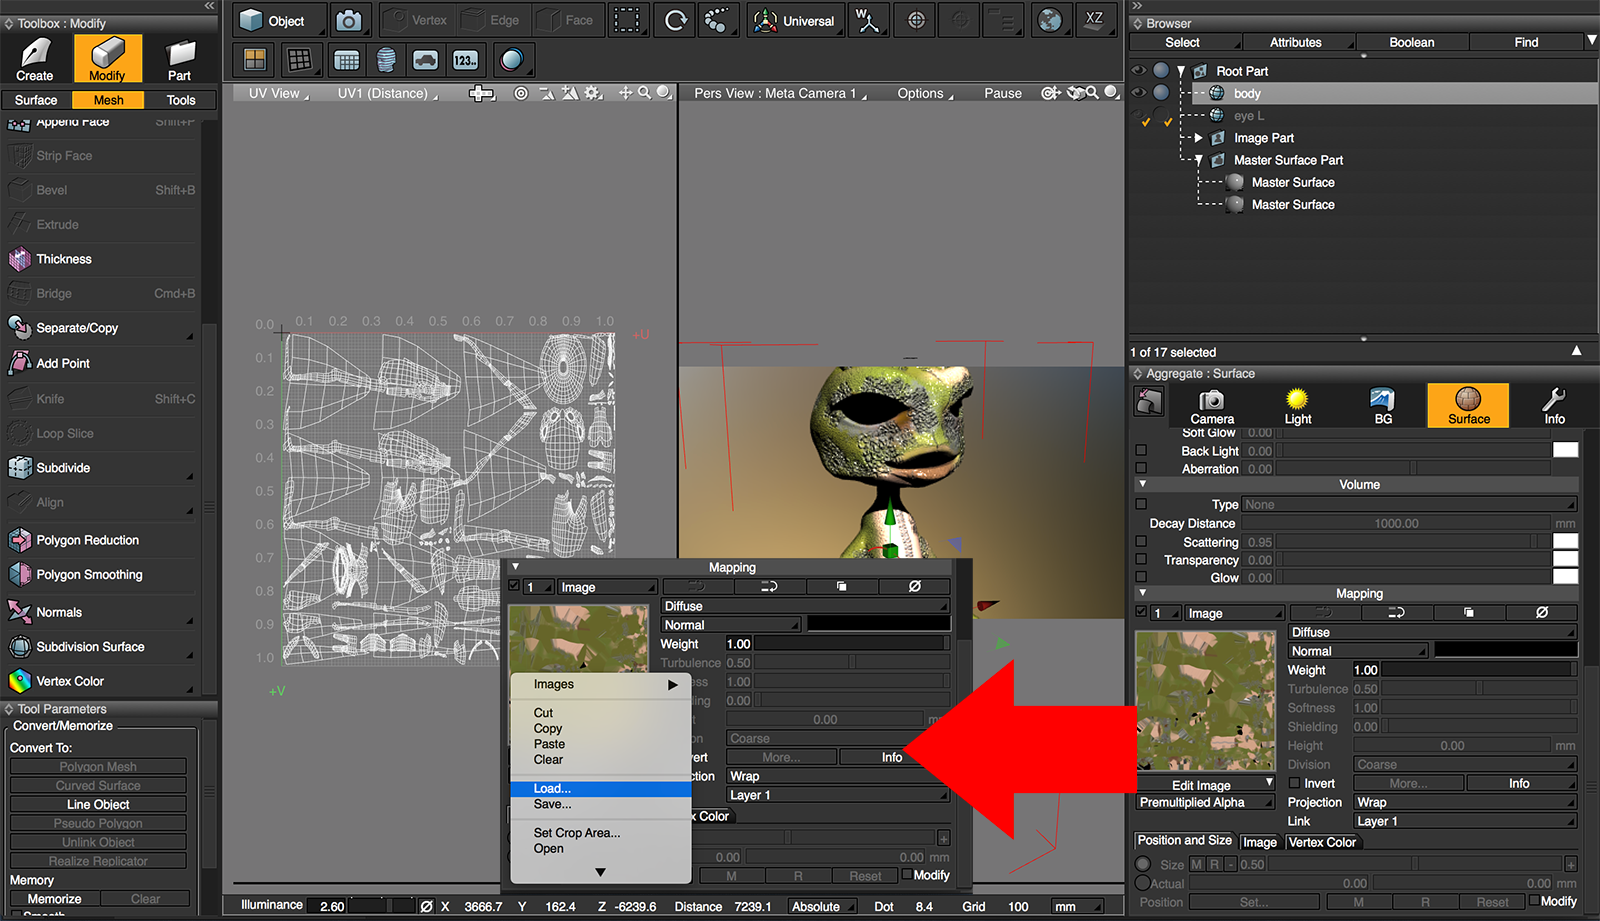
7 - Back to Shade 3D, in the Material tab, select your mapping layers by accessing the Edit Image Menu ( Edit image/ Load...). Then create a many layers as you want!
If you want more details about the texture export and texture placement, you can have a look at our previous tutorial (see below).
Substance Painter & Texture Export
By ft-lab
In the ver.1.2.0 version (or later) of Substance Painter, you can now create a Preset at the time of a new export.
Here, we decided to try the Unity export Preset for an output in Shade 3D.

Unity Texture Export
In the File Main Menu, select "Export all channels,". The "Export Document" dialog box appears.
When you select the "Configuration" tab here, a list of preset has already been prepared.
Here select the "Unity 4" Preset.
Preset Confirmation

Output maps
$mesh_$textureSet_DiffuseGlossiness
$mesh_$textureSet_Normal
$mesh_$textureSet_DiffuseIllumination
Three options are available:

"$mesh" is the main name(or the file's name)、"$textureSet" is the Texture Set's name. These names will be replaced.
DiffuseGlossiness: Unity4 Diffuse(RGB) + Glossiness(A).
Normal: Normal OpenGL(RGB).
DiffuseIllumination: Unity4 Diffuse(RGB) + Emissive(A).
For this, it can be changed by assigning and dragging the elements from the right side of the Input maps or Converted maps.
The colors on the Input maps or Converted maps will correspond to each assignment.
Furthermore, these settings will not stay when launching Substance Painter. Only after allocated the settings, they will be saved.
Export
Back to the Export tab, you can specify the information for the output.
You can select the destination folder and select the Preset to be applied (Select Unity 4 in this case),
You can also specifie the textures sizes.

After clicking the "Export" button, a confirmation message will appear.
Assign a Texture in Unity
Now lets check in Unity 4.6.1
Import the fbx shape, then, import the texture created in Substance Painter.
Place the Plane and Directional Light to the scene and then place the painted Mesh.
We have specified "Bumped Specular" as the Material's Shader.
For the Shininess, "Base (RGB) Gloss (A)" and two "Normalmap" are available. For this texture, we assigned: "mesh name _TextureSet name _DiffuseGlossiness.png" "mesh name _TextureSet name _Normal.png".

It will display your object as follow:

Export the Texture for Shade 3D
Lets now try to export our Substance Painter's texture to Shade 3D.
In the "File" section of the main menu, select "Export all channels" and select the "Configuration" tab of the "Export document" dialog box.
Here, you can add a new preset, press the "+" button in the Presets.
The preset's name would be "Shade 3D".
The Roughness is allocated "Gray"
Output texture for the Diffuse and Normal are "RGB" and for Roughness and Reflection, Gr "Gray" are used.

| Output Name | Type | Allocation |
|---|---|---|
| $mesh_$textureSet_Diffuse | RGB | Unity4 Diffuse |
| $mesh_$textureSet_Normal | RGB | Normal OpenGL |
| $mesh_$textureSet_Roughness | Gray | Roughness |
| $mesh_$textureSet_Reflection | Gray | Specular |
Specify "Shade 3D" which was created in the Configuration during the Export.
We decided to use four textures for one material.
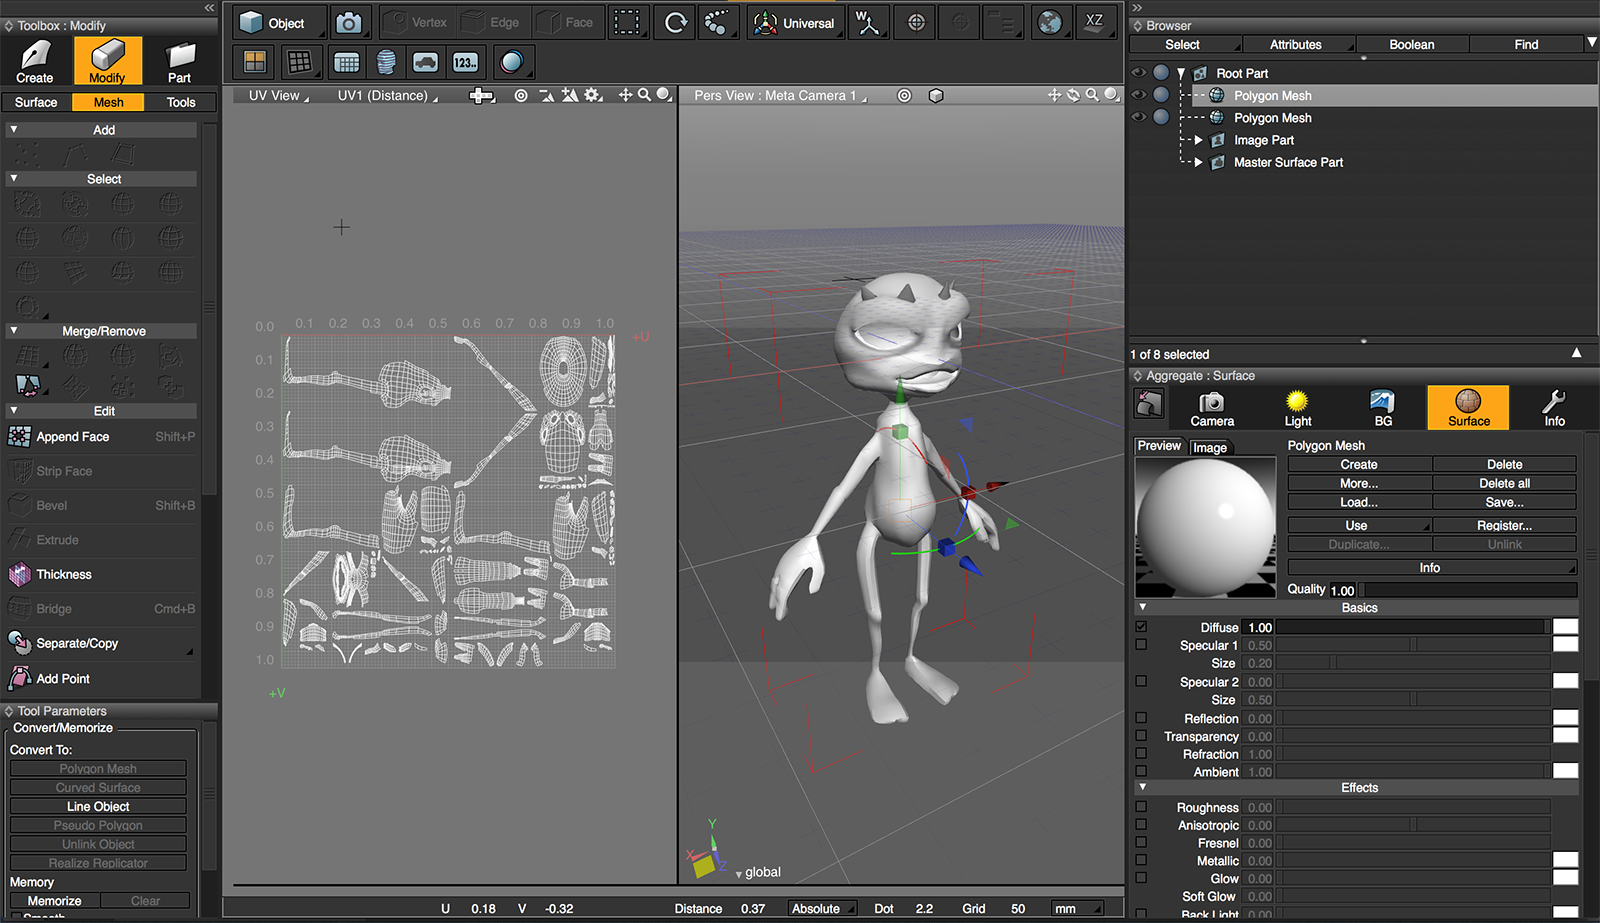
Assign a Texture in Shade 3D
Here, we are using Shade 3D ver.15.
Since it is a "Roughness" representation, if you want to render in Shade 3D you must use the "Path Tracing" mode.
"Read" the Texture
It will read the texture in the following order: "Diffuse", "Normal", "Roughness", "Reflection", created in Substance Painter.
For the texture in Diffuse mode, leave the texture's gamma at 1.0 / 2.2.
Designate the Surface Material
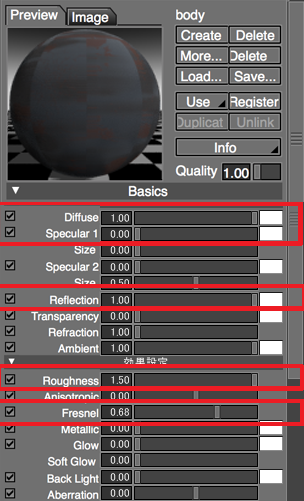
Specify the basic settings and effect settings of the surface material as follow:
| Element Name | Value |
|---|---|
| Diffuse | 1.0 |
| Specular 1 | 0.0 |
| Reflection | 1.0 |
| Roughness | 1.5 |
| Fresnel | 0.68 |
For the mapping layers of the surface material:
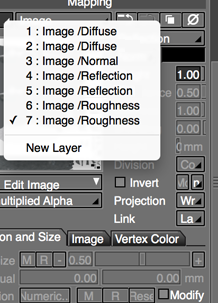
| Mapping | Texture Mode | Blending Mode | Color reversal |
|---|---|---|---|
| Diffuse | Diffuse | - | - |
| Diffuse | Reflection | Multiply | ○ |
| Normal | Normal | - | - |
| Reflection | Reflection | - | - |
| Reflection | Roughness | Multiply | ○ |
| Roughness | Roughness | - | ○ |
| Roughness | Reflection | Add | ○ |
* We encourage our readers to tell us if they are using different settings for better performances.
Rendering
We will perform a Path Tracing render. Please note the following points:
- The light source is only the IBL (Background). Brightness and Ambient Light are set to 0.
- Rendering mode is set to "Path Tracing". Cut-off Diffuse to 0.
- Gamma color correction set to 2.2
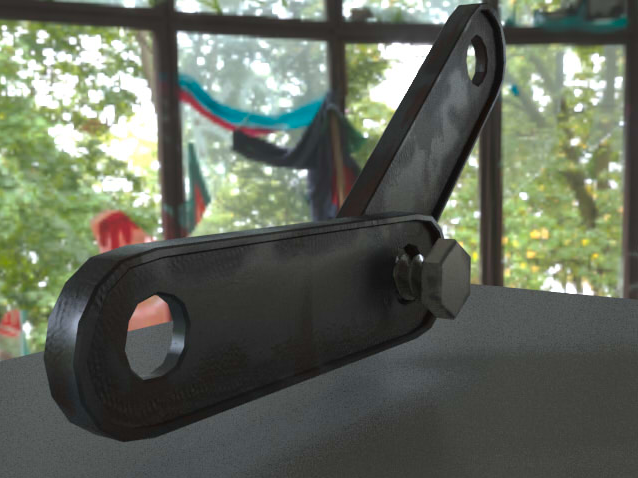
Here is the result: