


| >>Back to Tutorials Page<< |
Shade 3D & Daz 3D
If you wonder how you can export one of your Daz 3D model to Shade 3D, including its animation, here is a short walkthrough of the simple process you will have to follow.
From Daz 3D
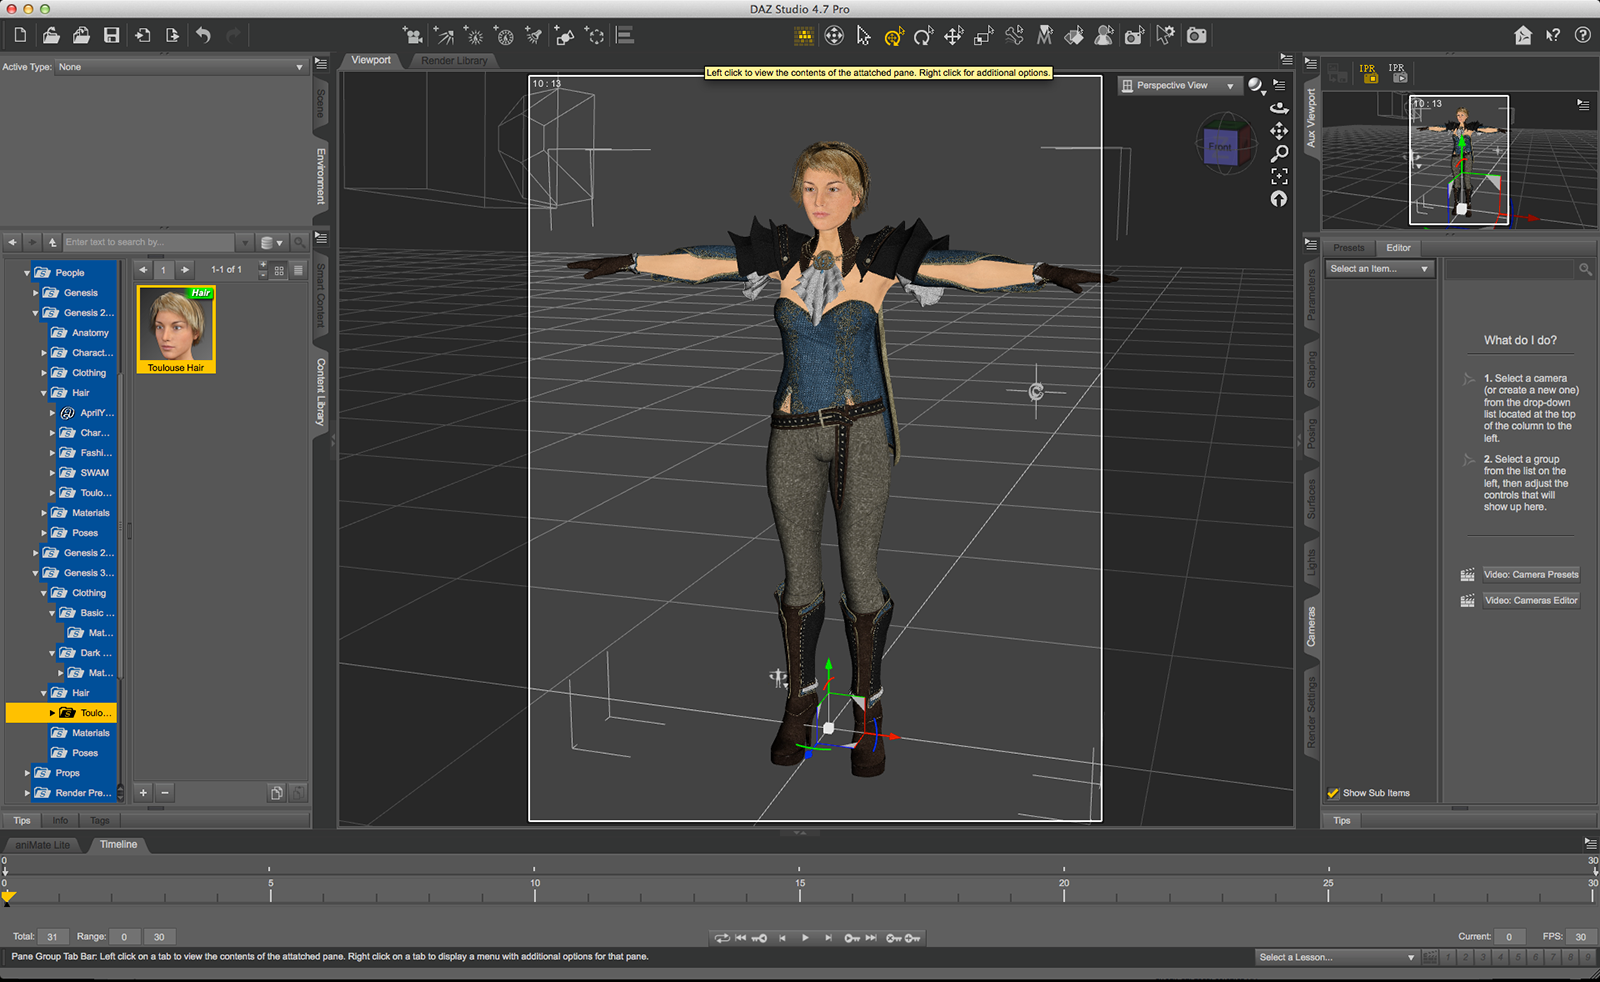
Launch Daz Studio, after creating and posing your character, you will be ready to export it to Shade 3D!
Follow the instructions below (click to enlarge the pictures)
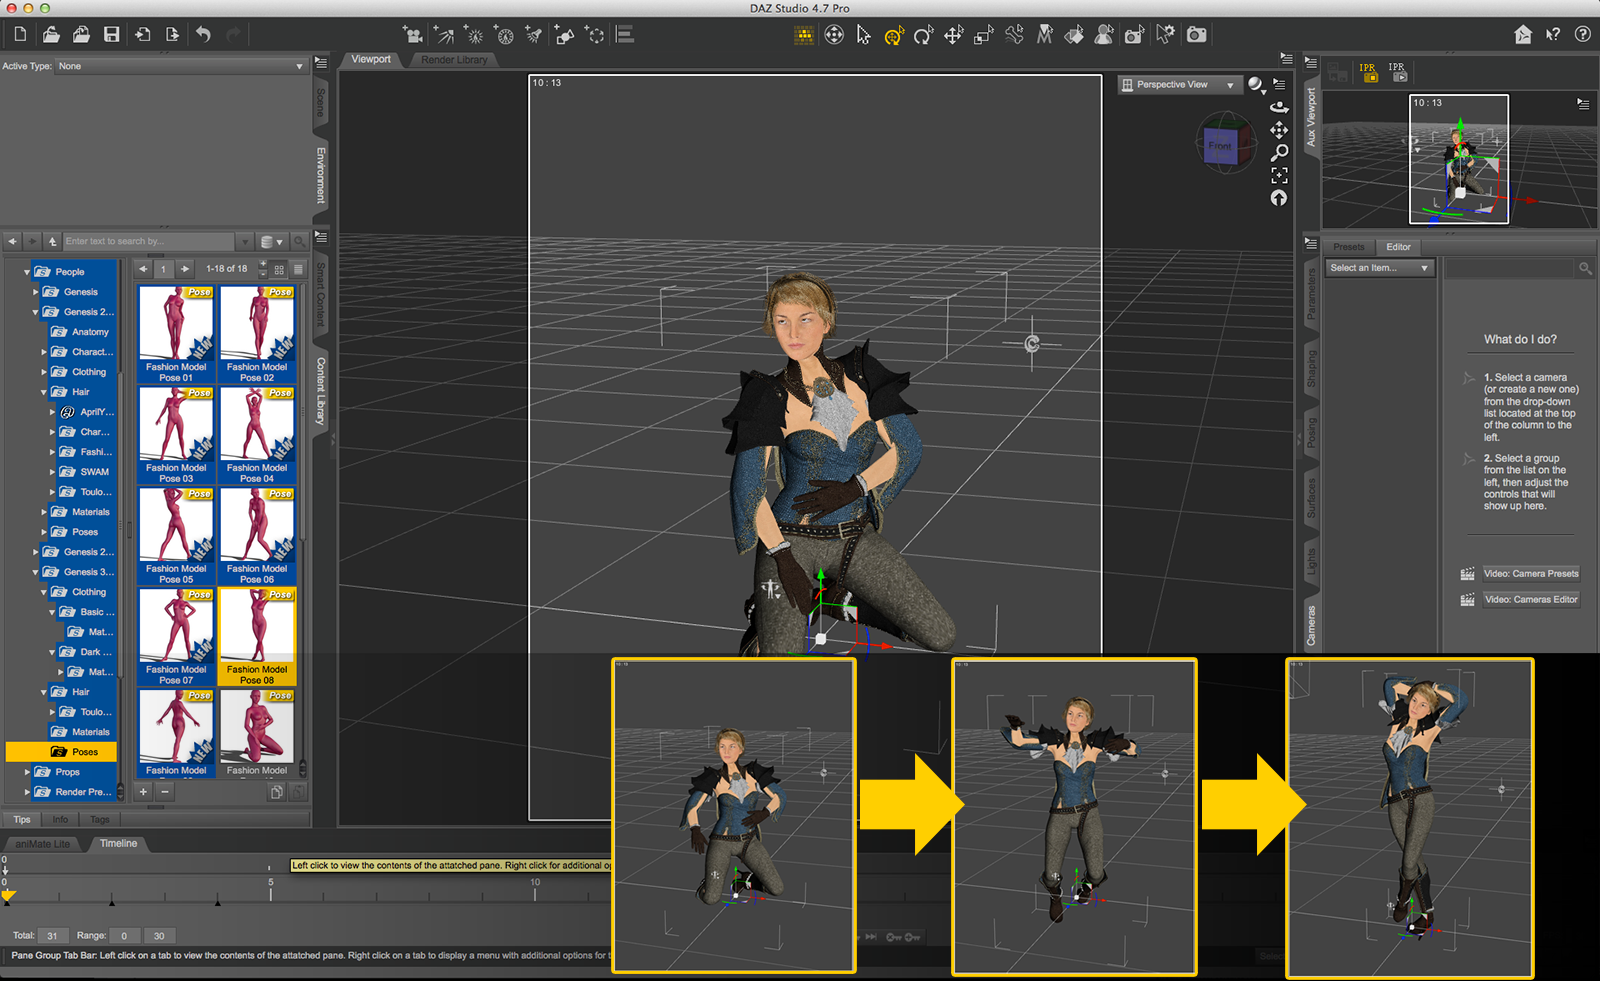
- Create and pose your character in Daz 3D.
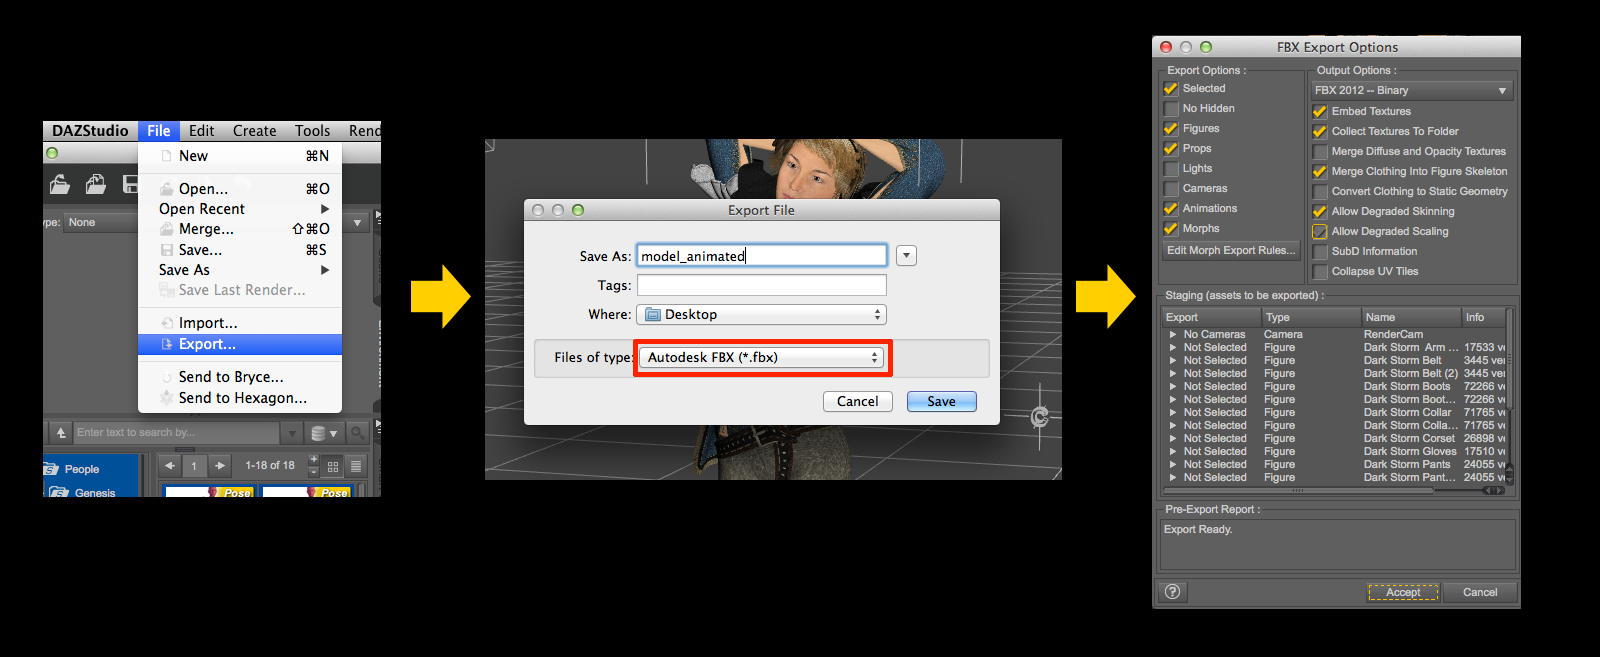
- In the File Menu, click Export and name tyour file after making sure to select "Autodesk FBX (*.fbx)" as the exportation format.
- The FBX export Options dialog box appears.
- Make sure that the following check boxes are checked:
"Selected", "Figures", "Props", "Animations', "Morphs", "Embed Textures", "Collect Textures To Folder", "Merge Clothing Into Figure Skeleton", "Allow Degraded Skinning" and "Allow Degraded Scaling".
Click "Accept".
 |
 |
 |
You can now fire Shade 3D up!
To Shade 3D
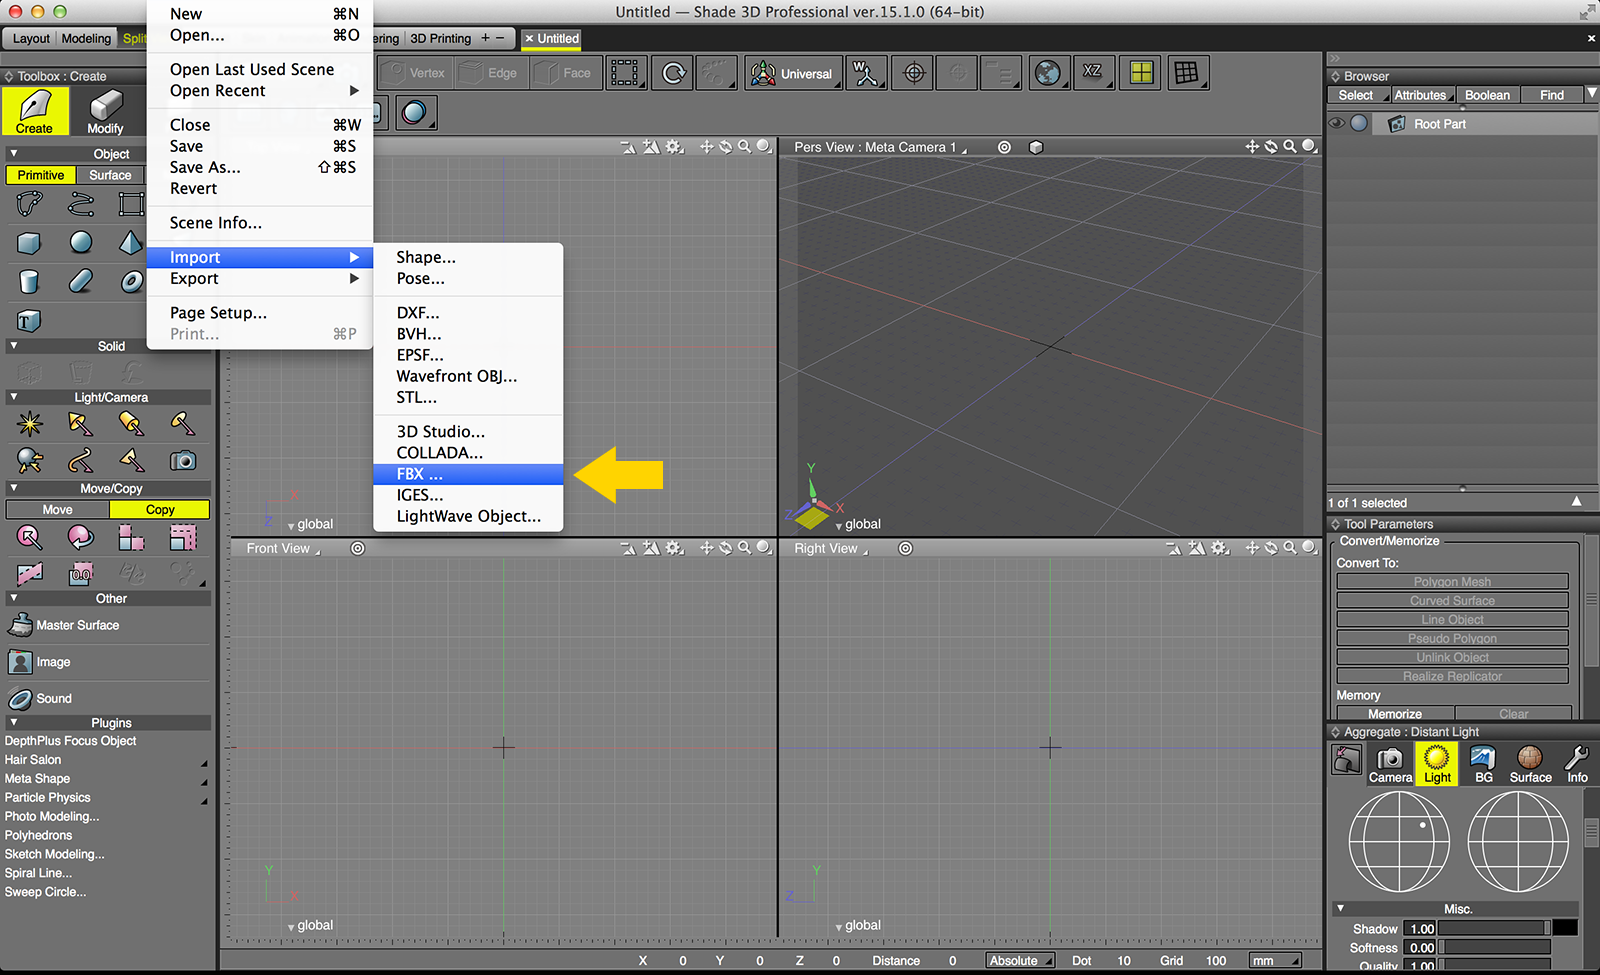
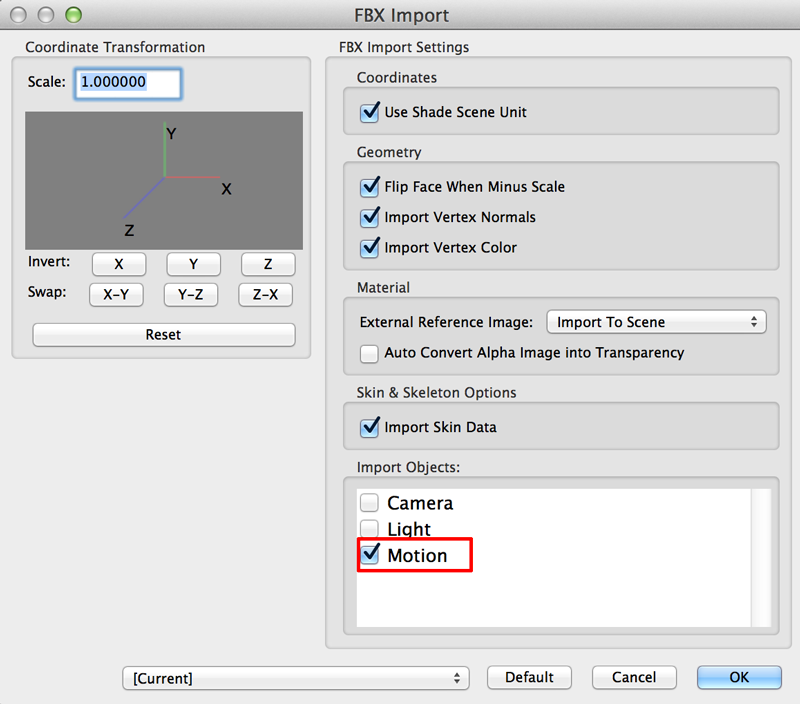
Click the File menu of Shade 3D and select "Import" and "FBX...".
A dialog box will appear (FBX Import), make sure that the "Motion" check box is checked and then click "OK".
 |
 |
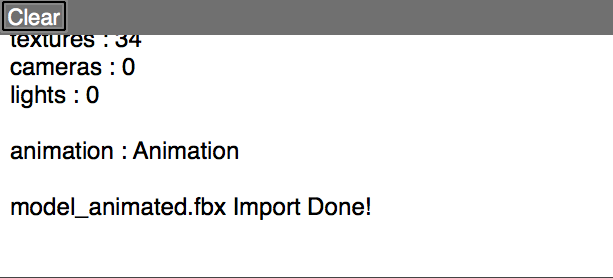
A pop up window will notify you of the Import success
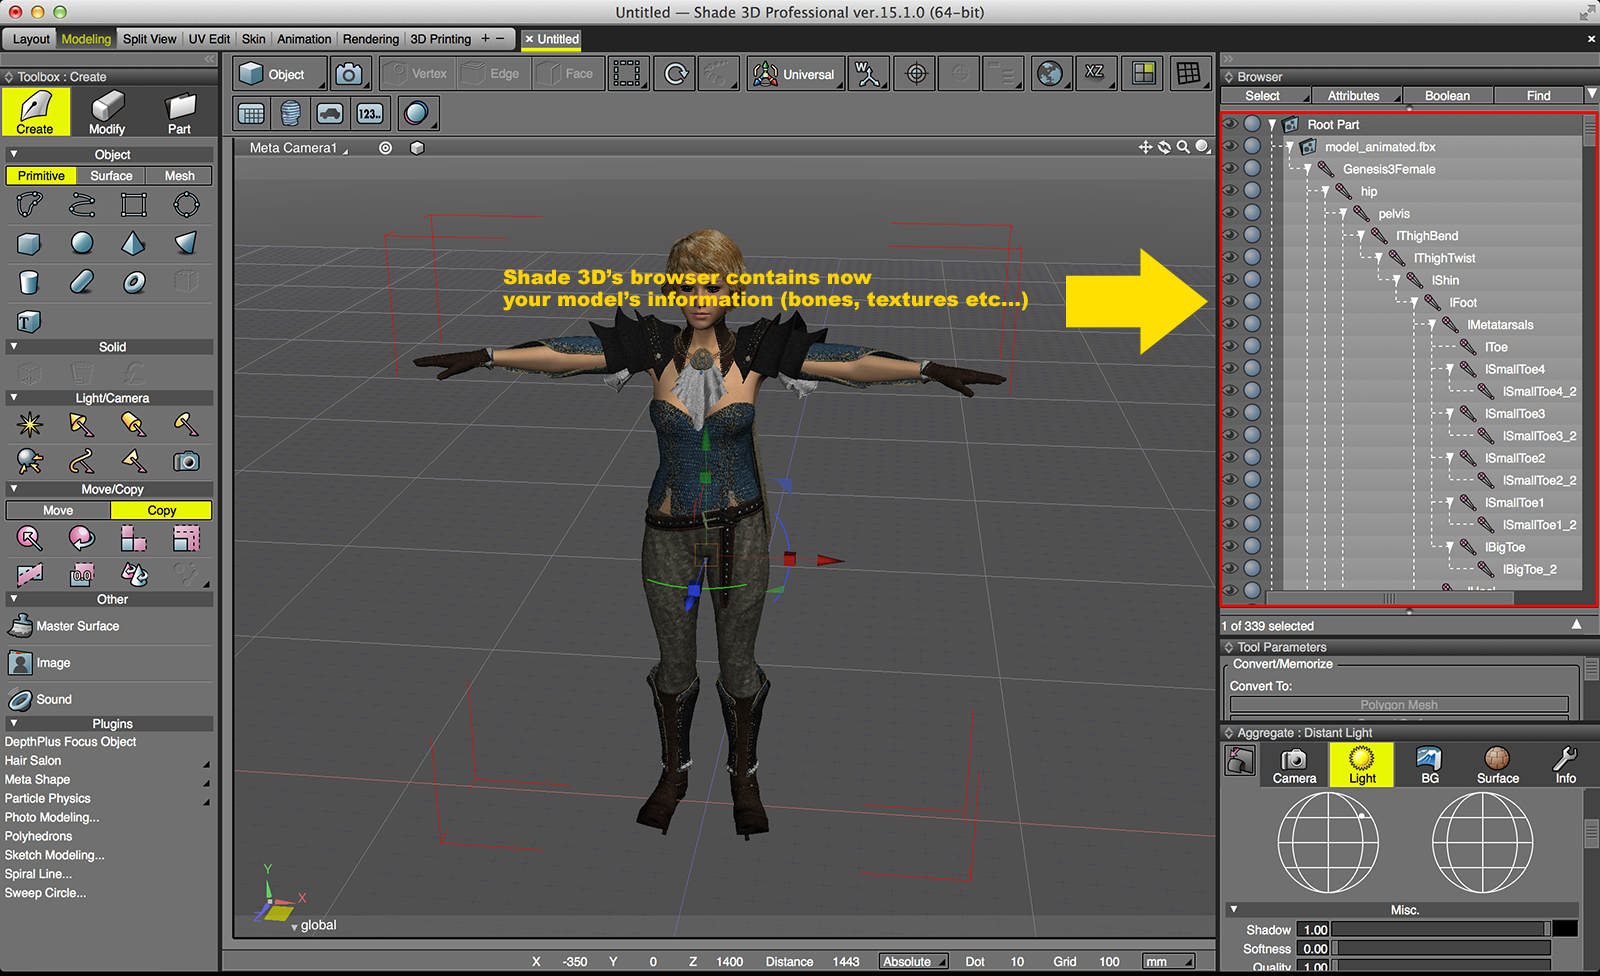
Your Model will appear in the T pose. In the Shade 3D Browser, you will find all your model's information.
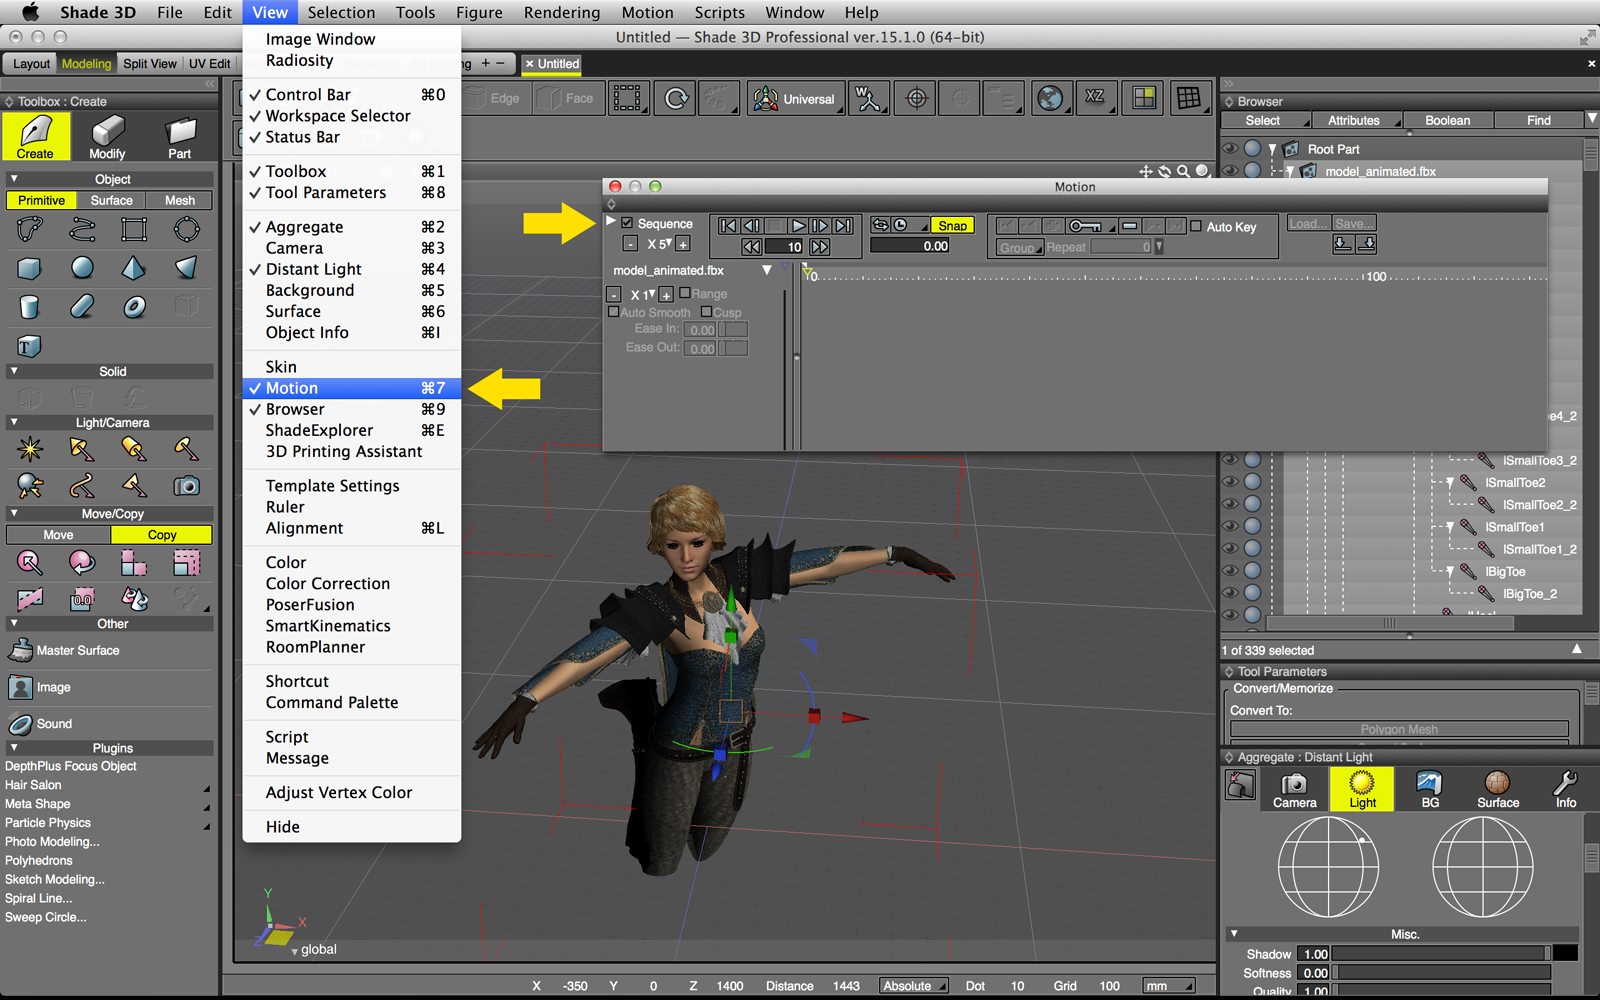
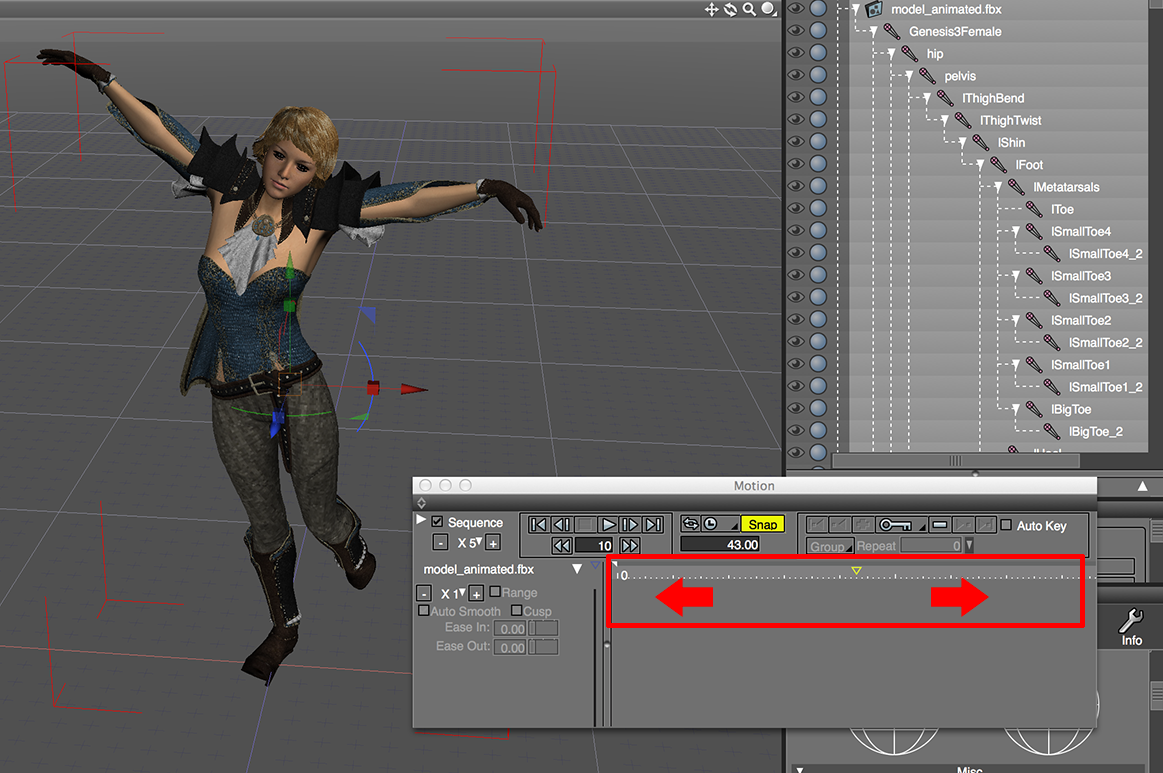
In the File Menu, select "View" and activate "Motion". A window displaying the timeline will appear. Make sure to check the "Sequence" checkbox.
You will see your character in its animation's first pose. By moving the yellow arrow along the timeline, you will see your Daz 3D animation playing.
 |
 |
 |